
Back to blog
How to Use Pinata IPFS Webhooks

One of the most requested features we’ve received at Pinata has been webhooks, and recently we delivered them through our partner Svix. They allow you to listen to events that happen on your Pinata account and send a payload to your server, enabling some pretty dynamic applications. Pinata’s webhooks offer a plethora of different events you can subscribe to, all with granular control, testing endpoints, verification, and more! In this post, we’ll be showing you how they work and how you can implement them into your next blockchain application.
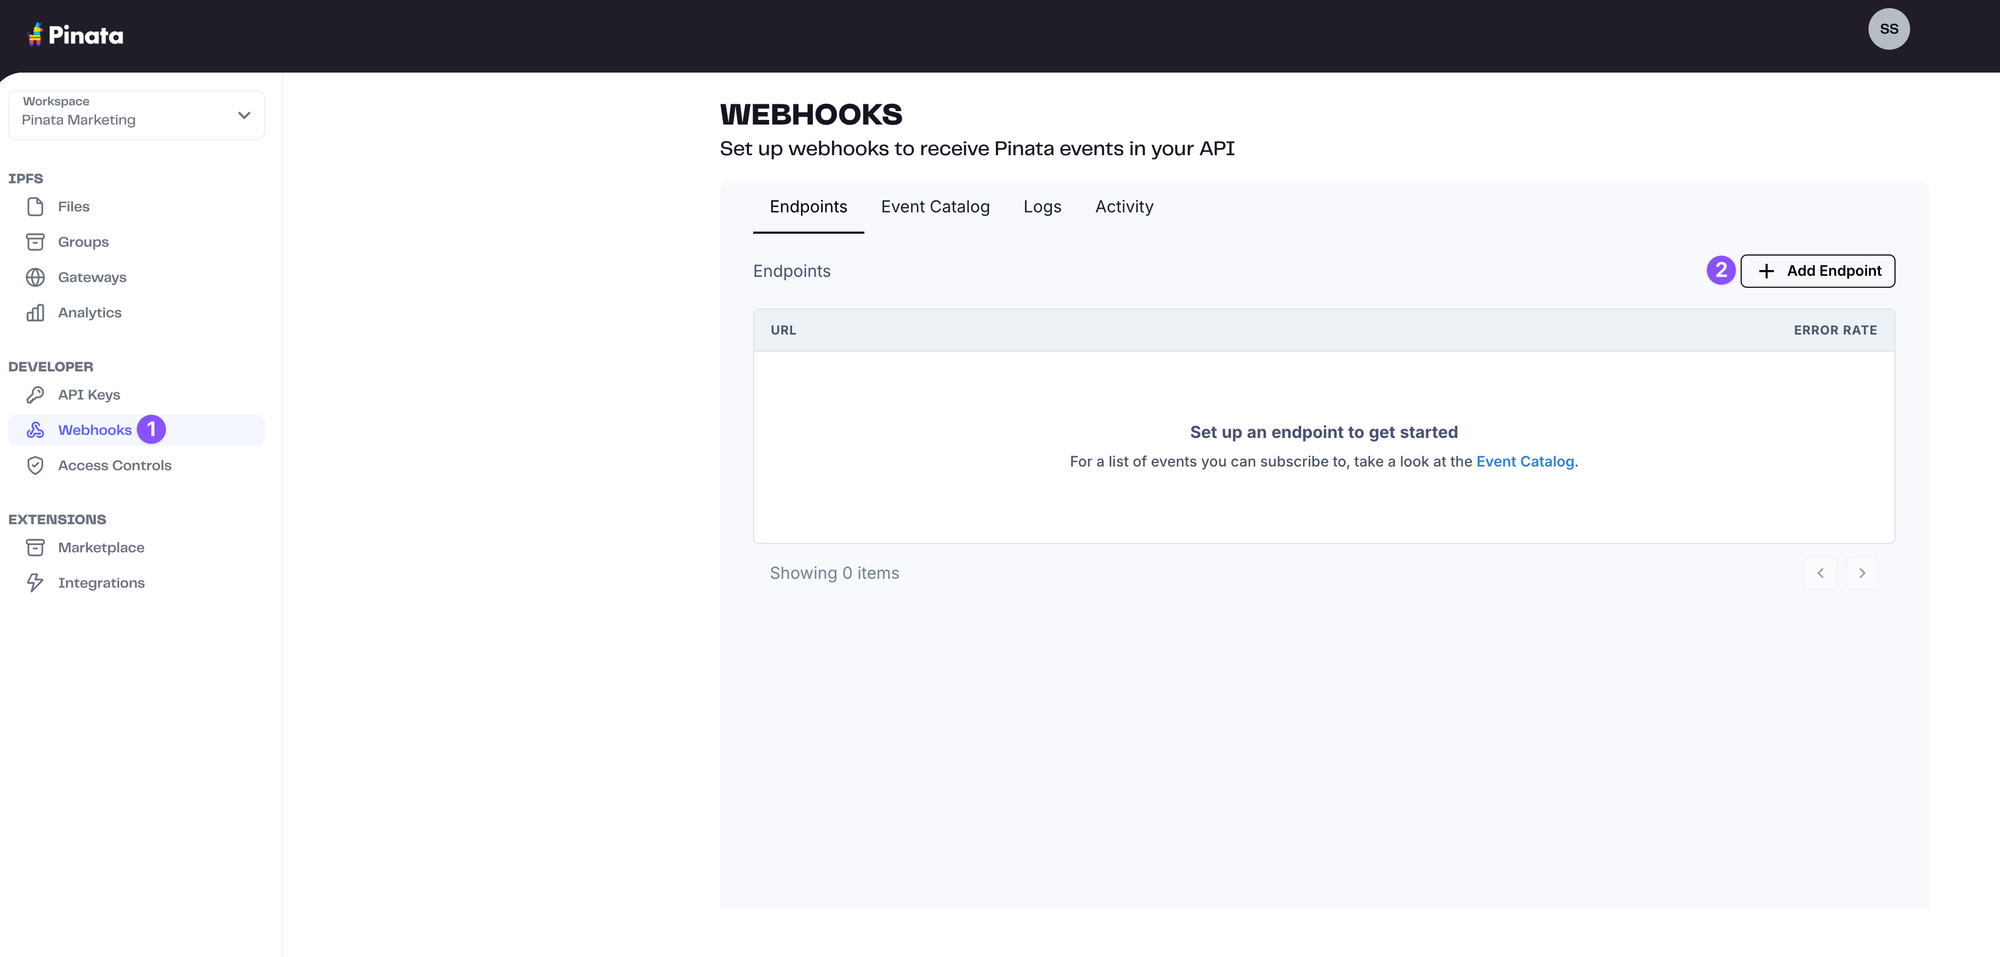
The first thing you’ll want to do is sign into your Pinata account. If you haven’t done so already, you can start for free! Once signed in, we’ll click on the Webhooks tab, then click “Add Endpoint” in the top right.
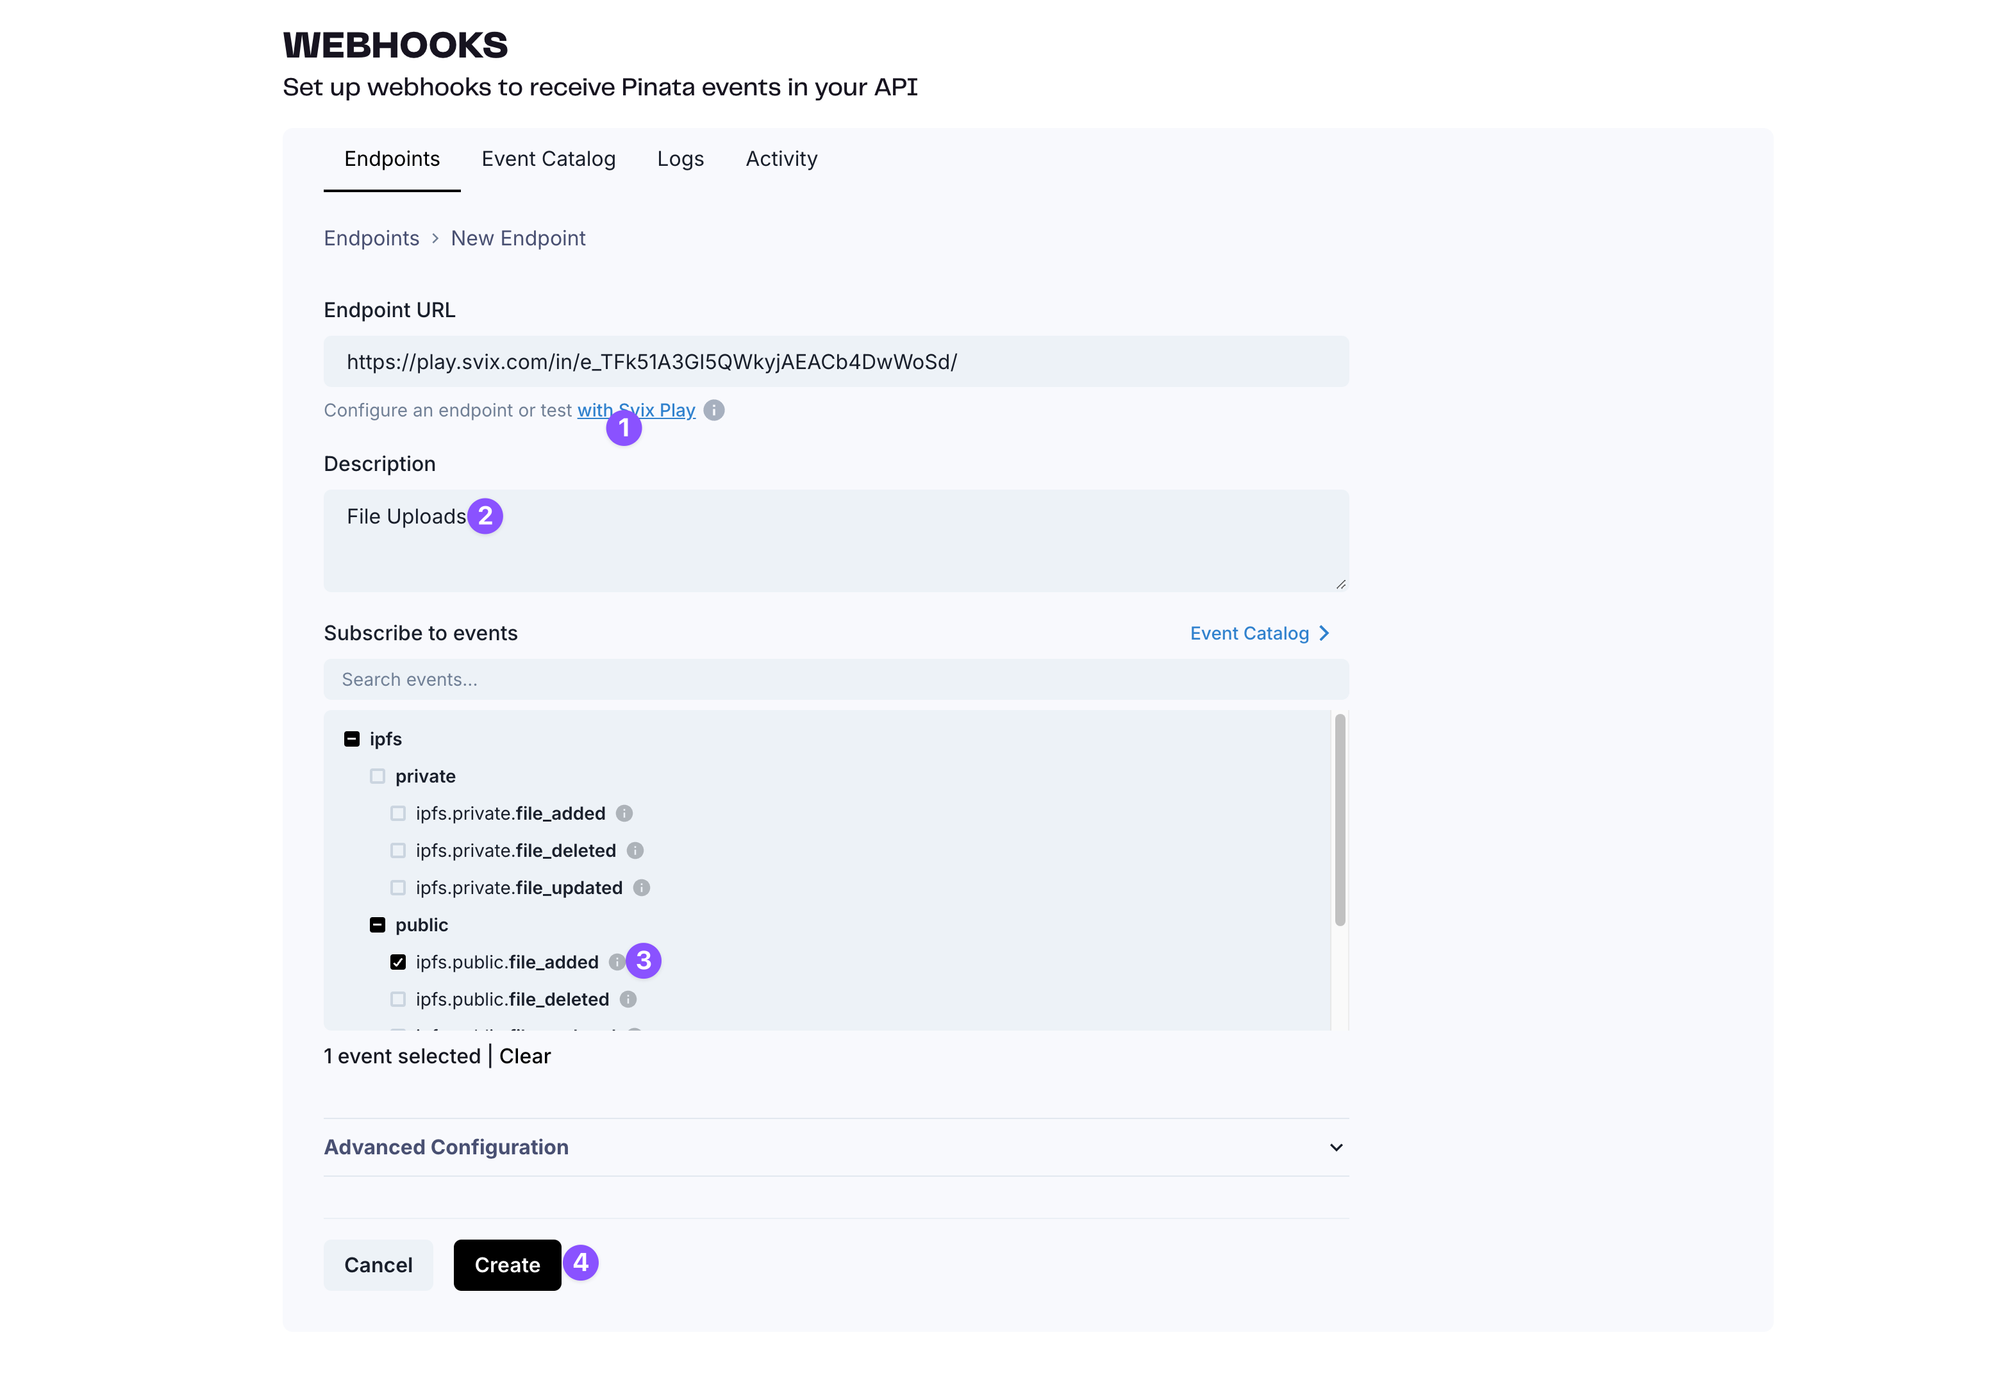
That will take us to a form where we can fill out our details, starting with the Endpoint URL. Generally, this would be an endpoint on your server that Pinata’s webhooks will send information to, but since we’re just testing it, you can click the link to use Svix Play which gives us a dummy endpoint to play with. Then just give it a description and select the event you want to subscribe to. There are loads of different events you can subscribe to, with more on the way, and you can explore them all at event-types.pinata.cloud. For this tutorial, we’ll just select ipfs.public.file_added. Once you have that, go ahead and click Create!
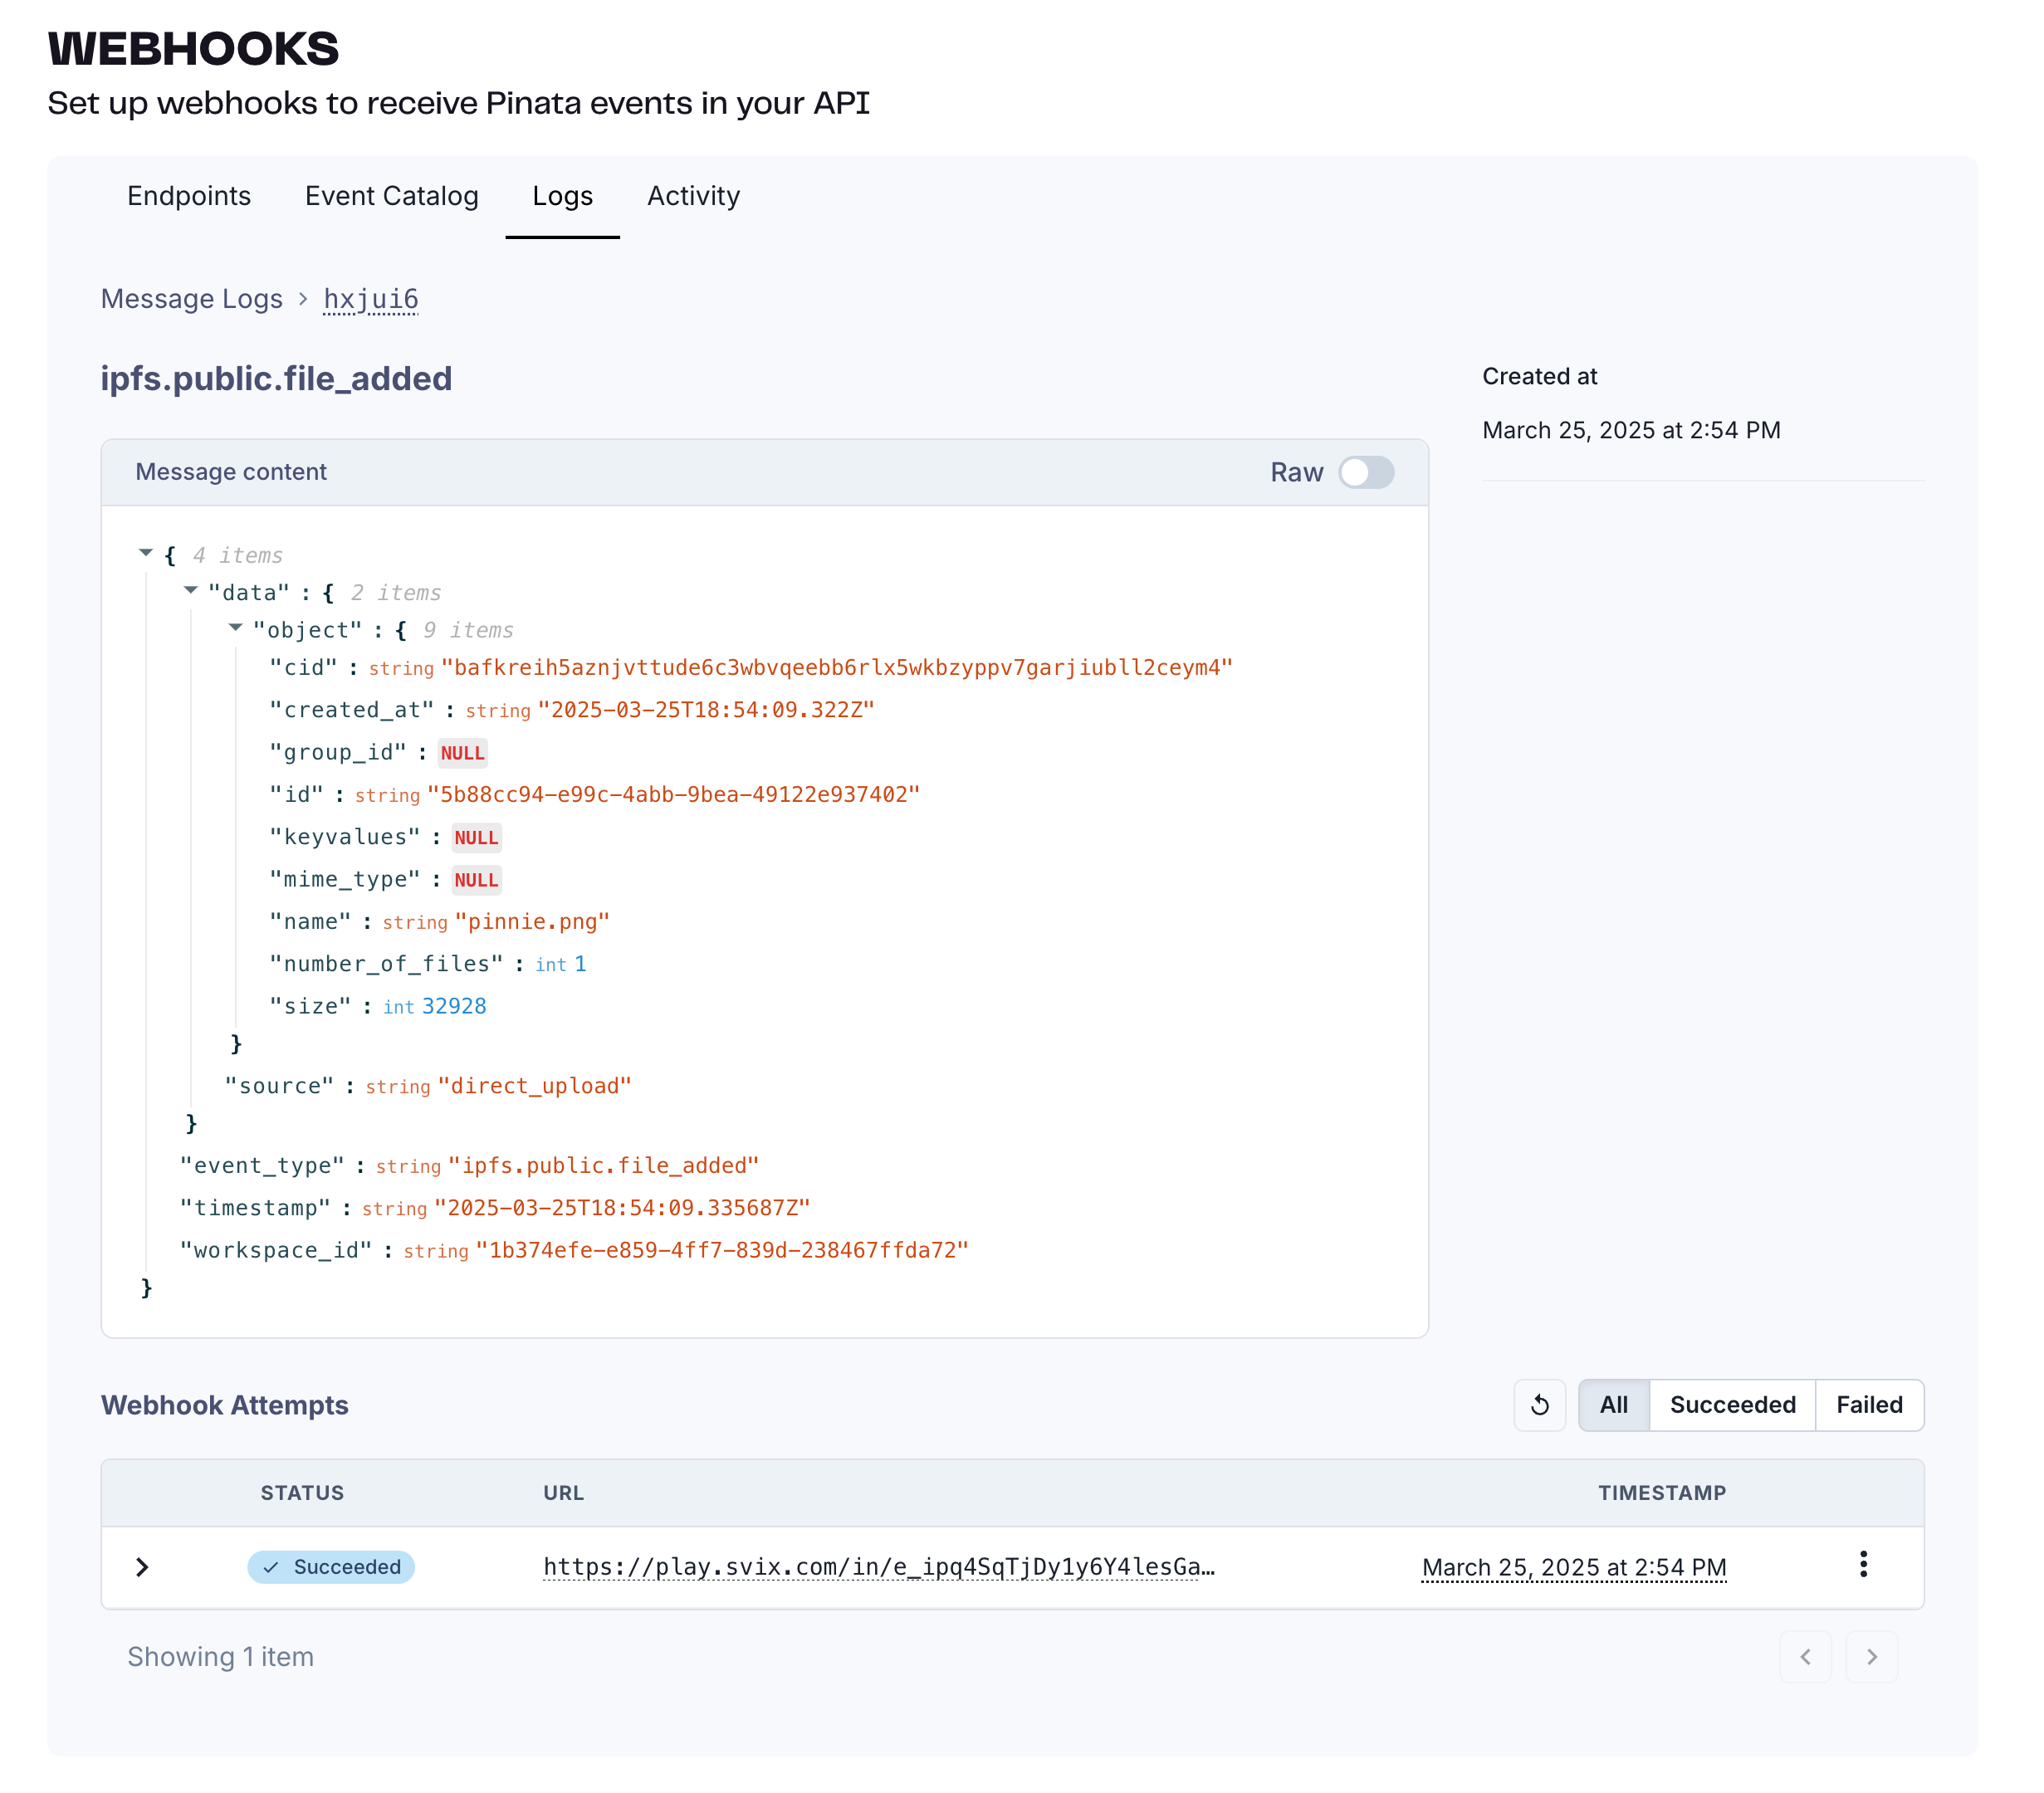
With our webhook ready to go, let’s test it out. Go to the files tab and upload a new file. If you don’t know what to upload, here’s a free pinnie.png :) After uploading the file, go back to the webhooks tab and click on the endpoint we created. At the bottom, you should see a new message attempt which we can click on.
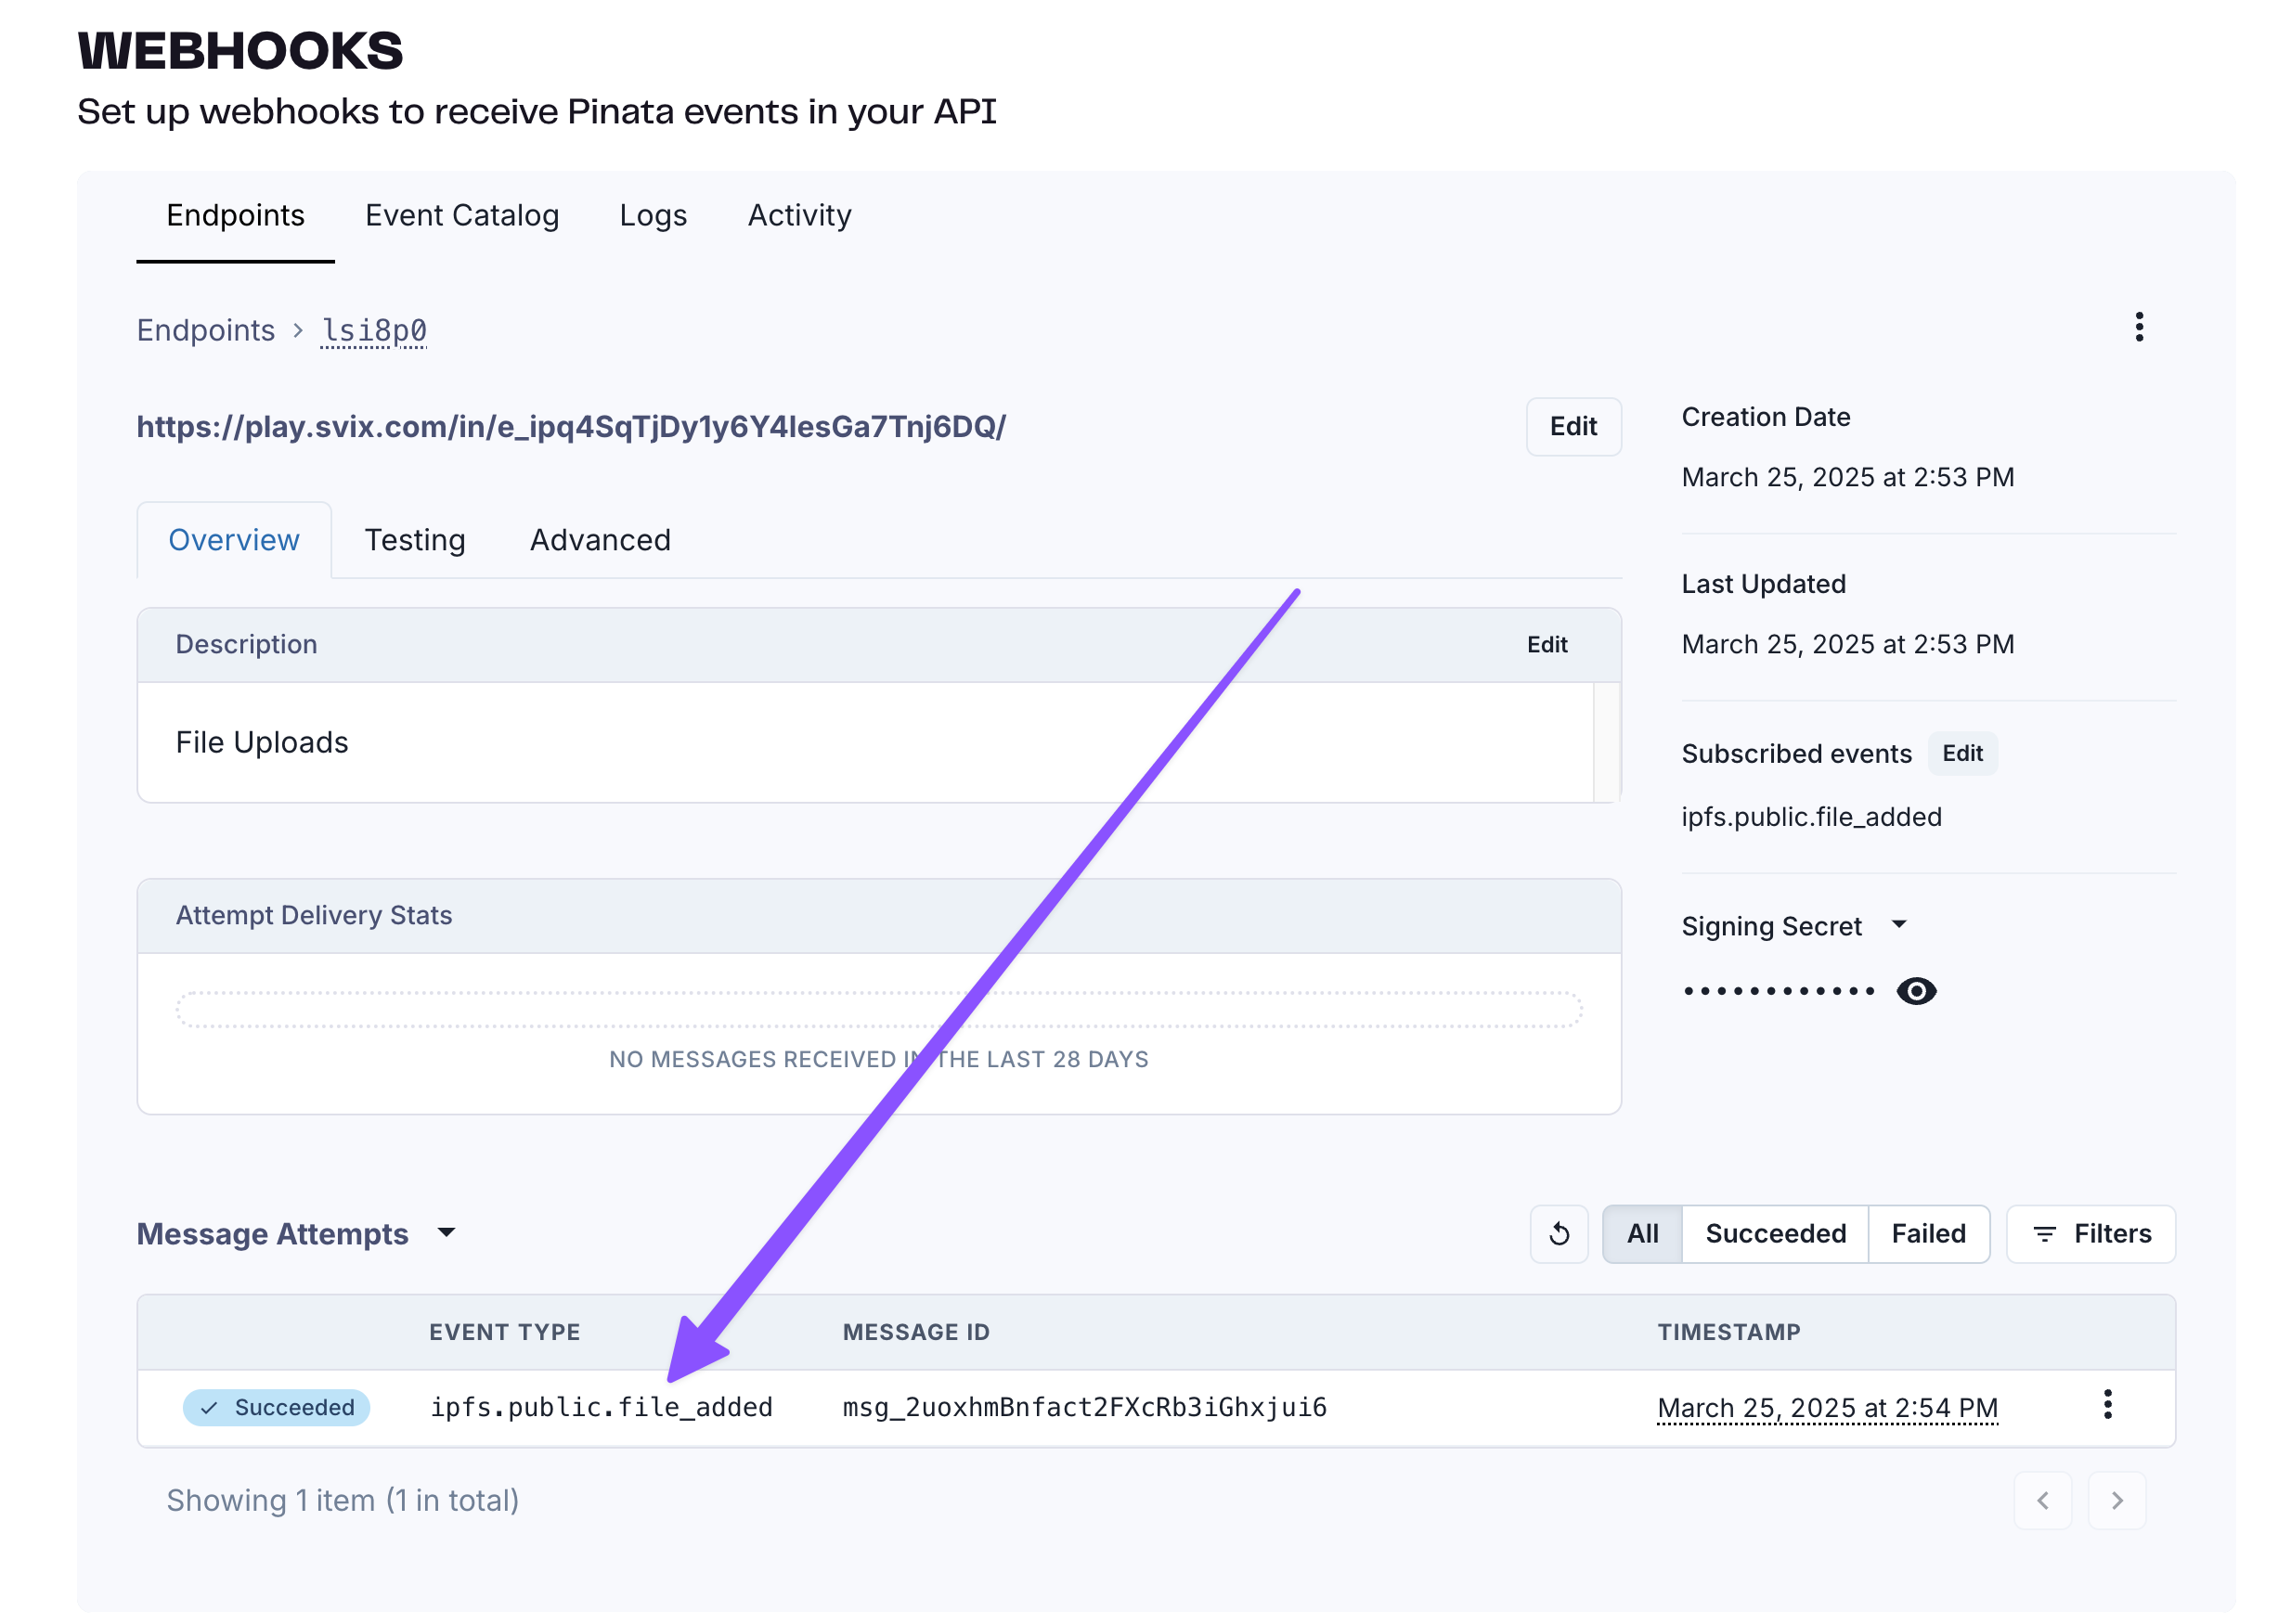
From this screen, we can get helpful info like the payload sent, if it was successful, and more!
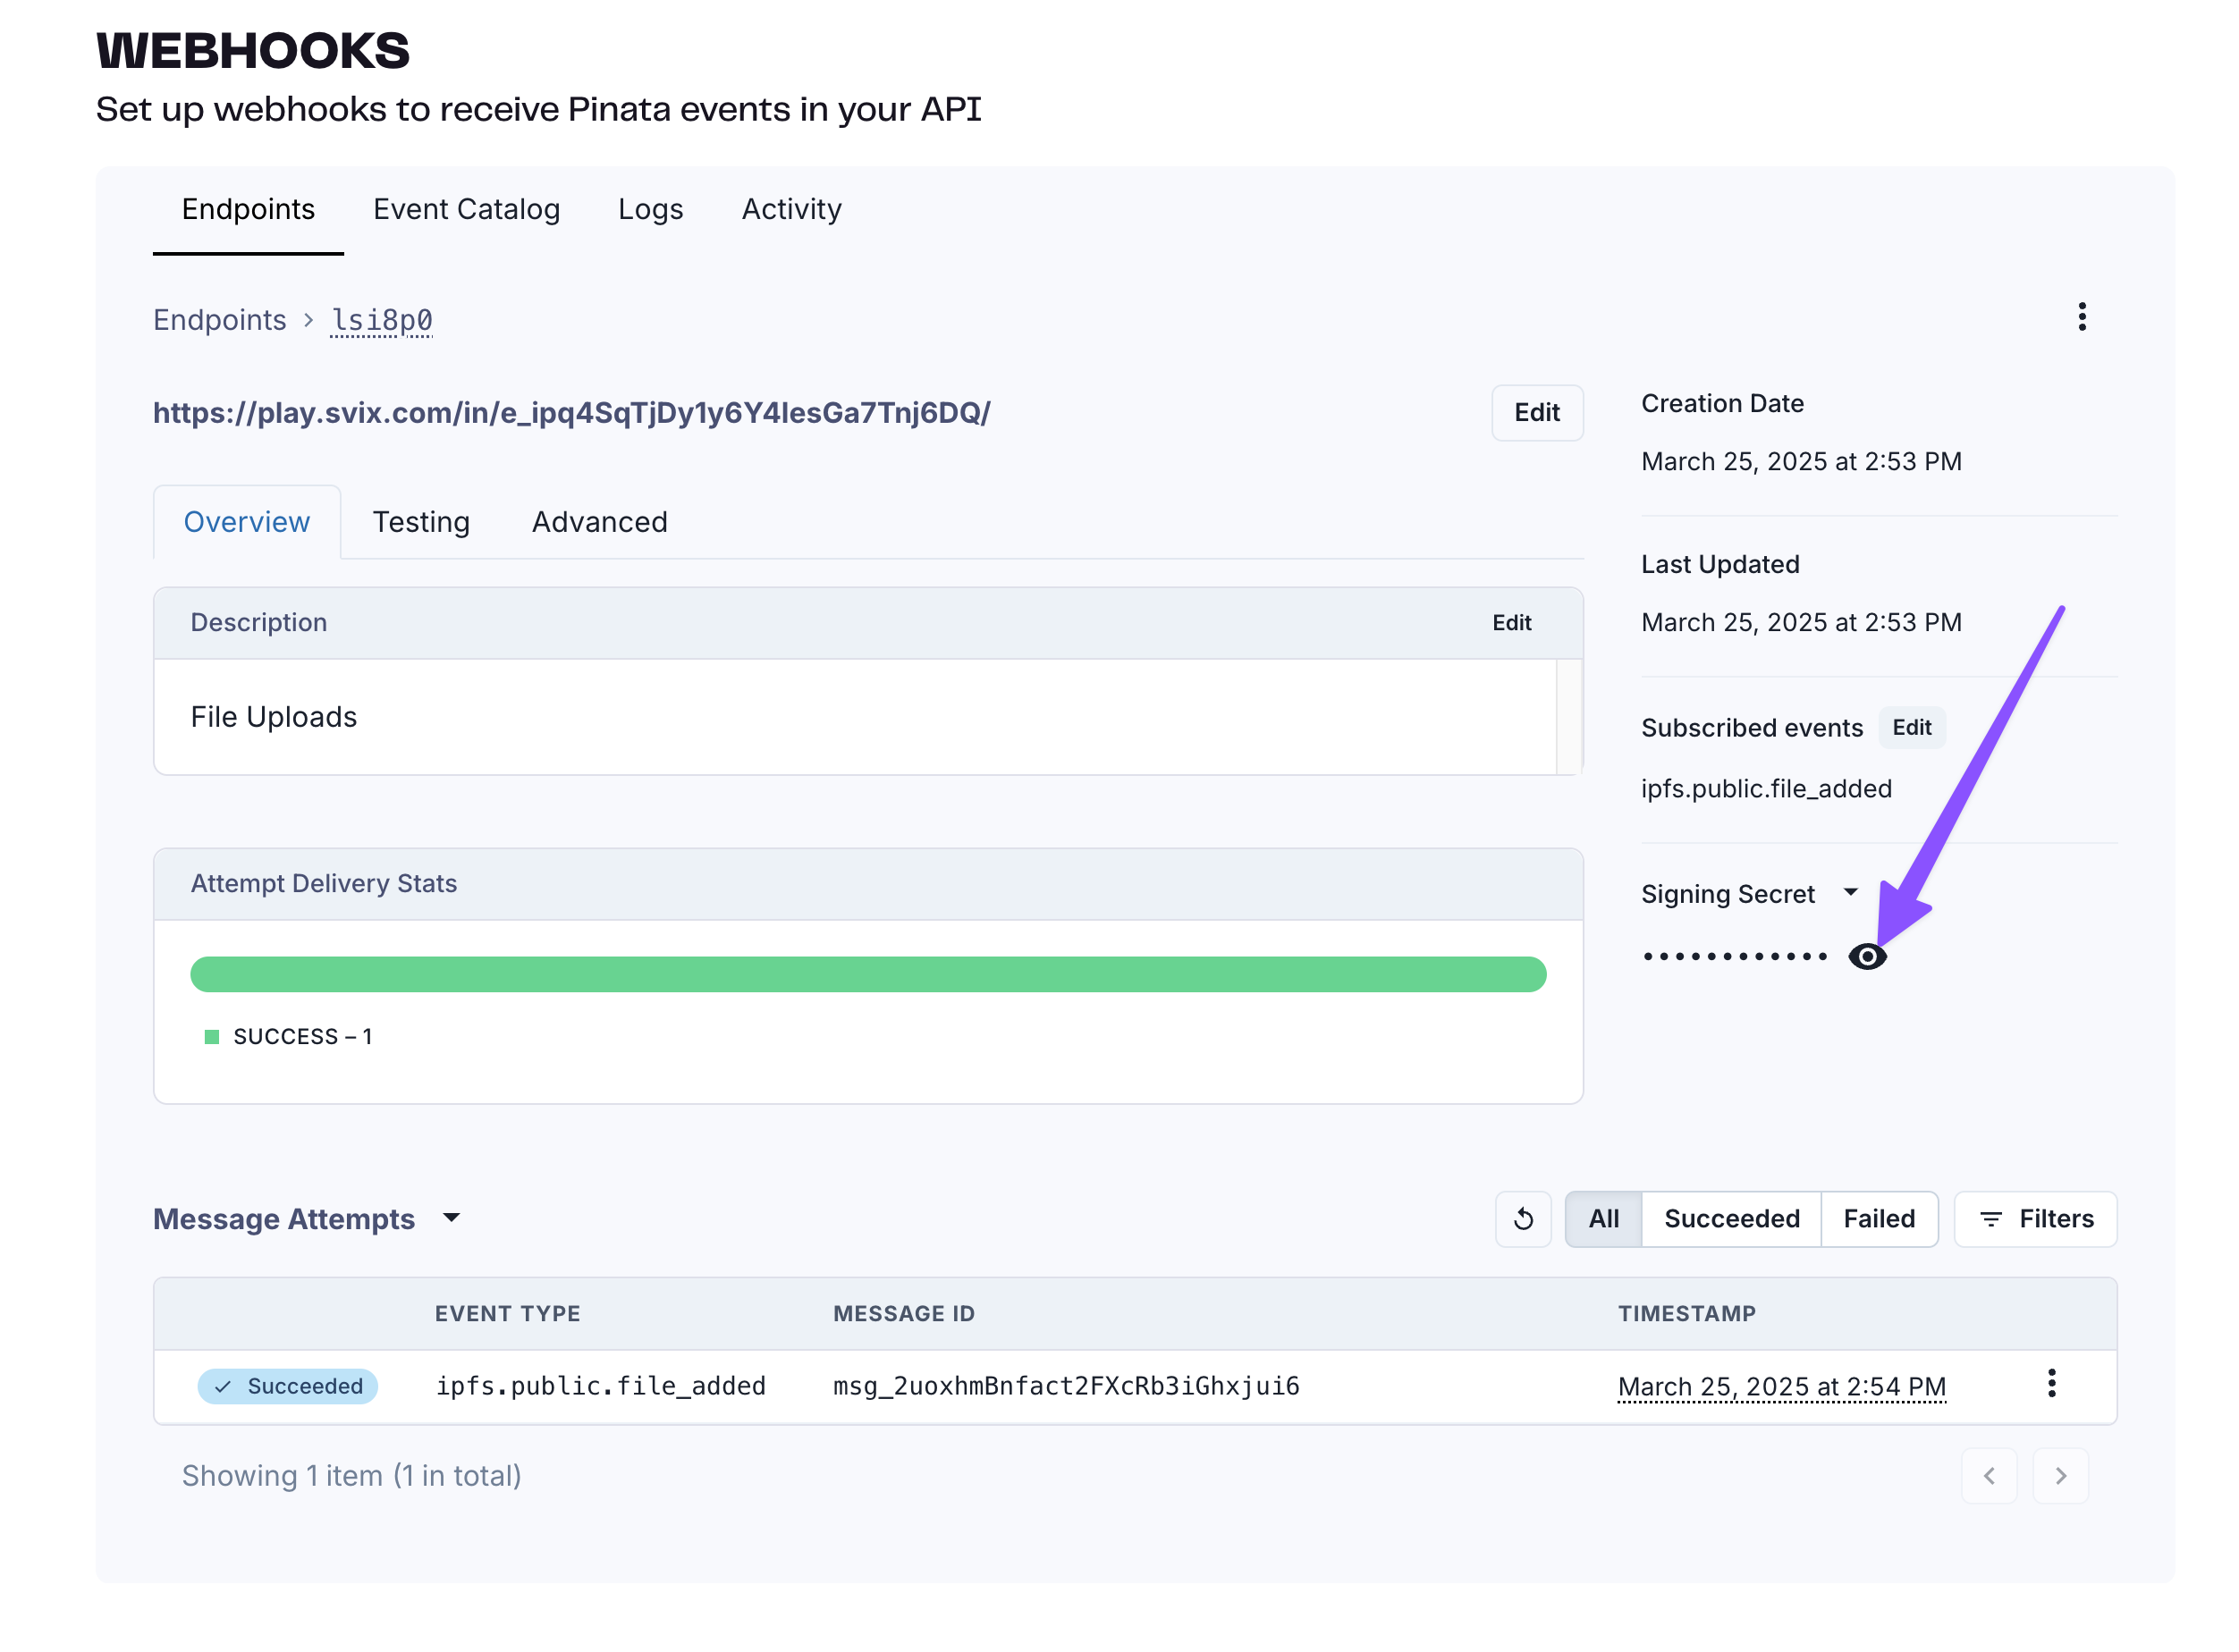
Now, one last thing you will probably want to do is verify your webhook payloads. The last thing you want is a malicious hacker trying to send fake data to your endpoints. Thankfully, Svix has this covered; each endpoint you setup has its own secret and a library to verify it with. If you click on the main page for your endpoint, then you’ll see a Signing Secret on the right hand side. Click on the eye icon to reveal it, then copy it somewhere safe.
Once you have the secret, you can use the svix library to verify the each incoming webhook.
import { Webhook } from "svix";

const secret = "whsec_MfKQ9r8GKYqrTwjUPD8ILPZIo2LaLaSw";

// These were all sent from the server
const headers = {
  "webhook-id": "msg_p5jXN8AQM9LWM0D4loKWxJek",
  "webhook-timestamp": "1614265330",
  "webhook-signature": "v1,g0hM9SsE+OTPJTGt/tmIKtSyZlE3uFJELVlNIOLJ1OE=",
};
const payload = '{"test": 2432232314}';

const wh = new Webhook(secret);
// Throws on error, returns the verified content on success
const payload = wh.verify(payload, headers);
It’s that simple! Pinata makes it seamless to integrate webhooks into your blockchain application and opens up a host of possibilities with IPFS and decentralized file management. Don’t take our word for it though, try it out yourself by signing up today.
Happy Pinning! :)