
Back to blog

How to Update an NFT Image using Hot Swaps

IPFS is great for providing immutable file integrity for NFTs. However, there are some cases where this benefit becomes inconvenient. The standard for NFTs on IPFS makes it impossible to update an NFT unless done on the smart contract level by updating a tokenURI or baseURI. If you ever wanted a dynamic NFT, you would have to use a server which isn’t as secure for your NFTs. What if I said you could have both? Pinata recently announced a new feature for gateways called Hot Swaps. This is a opt-in plugin you can install on a Pinata Dedicated Gateway that allows you to swap one CID for another. For instance, if I visit example.mypinata.cloud/ipfs/CID1 I can swap CID1 for CID2 without changing the path of CID1. This means I can mint an NFT with an image link that can update, but still have the content on IPFS.
Now you might be thinking this could be dangerous to the NFT ecosystem, especially considering the history of rugged projects that didn’t use IPFS. Pinata has thought through this and we’ve built transparency throughout the whole system. Here’s some key points:
- The Hot Swaps plugin has to be installed by the owner of the gateway. If you pull the CID through another gateway or a public gateway, you will get the original content.
- Pinata has an SDK method and API endpoint you can use to see the history of swaps for a CID, which can be accessed from any Pinata account API key
- Gateways that do have the Hot Swaps plugin installed will have an
etagin the request headers showing what the current mapped CID is. e.g. if I requestCID1I will seeCID2in theetagbecause that is the content I am seeing.
These measures ensure you can enable dynamic NFTs with transparency so users and platforms alike can identify them. With that said let’s show you how you can use Hot Swaps to mint an NFT and update the image after the fact!
Setup
In order to kick off our little project you’ll need a few things.
NFT Media
First you’re gonna need two images for your NFT; the original and a new one that you’ll update to. If you need some inspiration check out this original image I’m going to use, as well as the replacement.
Pinata
Next you’re gonna need a free Pinata account and follow these steps in the docs to make your Pinata API Key JWT and locate your Pinata Gateway. One other thing you’ll need to do is install the Hot Swaps Gateway Plugin. It’s super simple, just follow these steps.
Crypto & Code
You’ll also need a wallet with some testnet funds. We’ll be deploying to Base Sepolia in this tutorial but you can really use any EVM chain as it follows the same patterns. Finally you’re gonna need Node installed on your computer and a text editor, and a little experience with Typescript and Solidity.
Code Setup
To start the project you will want to open your terminal and run the command below to make a new project folder, cd into it, then initialize it with Hardhat.
mkdir nft-swap && cd nft-swap && npx hardhat init
From there you will be prompted with a few options to start out with and you will want to pick Create a TypeScript project (with Viem) from the list. After everything is downloaded we’ll download just a few more dependencies.
npm i pinata-web3 dotenv @openzeppelin/contracts
Now you will want to open the project in your text editor of choice. First thing we need to do here is create a .env file in the root of the project folder and put in the variables below, making sure to use your own keys and values.
PINATA_JWT= # Your Pinata JWT API key
GATEWAY_URL= # Your Pinata Gateway URL "example.mypinata.cloud"
PRIVATE_KEY= # Your wallet private key with testnet funds starting with 0x
After our variables are set we’ll want to make some alterations to the already included hardhat.config.ts file.
import type { HardhatUserConfig } from "hardhat/config";
import "@nomicfoundation/hardhat-toolbox-viem";
import "dotenv/config";

const config: HardhatUserConfig = {
	solidity: {
		version: "0.8.20",
		settings: {
			optimizer: {
				enabled: true,
				runs: 200,
			},
		},
	},
	paths: {
		sources: "./contracts",
		tests: "./test",
		cache: "./cache",
		artifacts: "./artifacts",
	},
	networks: {
		base_sepolia: {
			url: "<https://sepolia.base.org>",
			accounts: [`${process.env.PRIVATE_KEY_1}`],
		},
		base: {
			url: "<https://mainnet.base.org>",
			accounts: [`${process.env.PRIVATE_KEY_1}`],
		},
	},
};

export default config;
In this file we setup our solidity version and some small settings for optimization, as well as the networks we’ll use. I’ve included base mainnet in case you wanted to deploy the NFT with real funds but you can leave it out if you want to. That does it for our setup!
Smart Contract Deployment
In order to mint an NFT in the first place we need to deploy our smart contract, and thankfully these days that’s a breeze. My preferred method of spinning up an NFT contract is using the Open Zeppelin Contract Wizard which makes it simple to setup a nice default contract to work with. I’ve whipped an ERC721 default contract you can use for this tutorial, but you can just as easily make a few tweaks to do ERC1155 instead. Inside your project folder there is a contracts folder with a Lock.sol file which you will want to delete. Make a new file called Pinnie.sol and put the following code inside.
// SPDX-License-Identifier: MIT
// Compatible with OpenZeppelin Contracts ^5.0.0
pragma solidity ^0.8.20;

import "@openzeppelin/contracts/token/ERC721/ERC721.sol";
import "@openzeppelin/contracts/token/ERC721/extensions/ERC721URIStorage.sol";
import "@openzeppelin/contracts/token/ERC721/extensions/ERC721Pausable.sol";
import "@openzeppelin/contracts/access/Ownable.sol";
import "@openzeppelin/contracts/token/ERC721/extensions/ERC721Burnable.sol";

contract Pinnie is
    ERC721,
    ERC721URIStorage,
    ERC721Pausable,
    Ownable,
    ERC721Burnable
{
    uint256 private _nextTokenId;

    constructor() ERC721("Pinnie", "PIN") Ownable(msg.sender) {}

    function pause() public onlyOwner {
        _pause();
    }

    function unpause() public onlyOwner {
        _unpause();
    }

    function safeMint(address to, string memory uri) public onlyOwner {
        uint256 tokenId = _nextTokenId++;
        _safeMint(to, tokenId);
        _setTokenURI(tokenId, uri);
    }

    // The following functions are overrides required by Solidity.

    function _update(
        address to,
        uint256 tokenId,
        address auth
    ) internal override(ERC721, ERC721Pausable) returns (address) {
        return super._update(to, tokenId, auth);
    }

    function tokenURI(
        uint256 tokenId
    ) public view override(ERC721, ERC721URIStorage) returns (string memory) {
        return super.tokenURI(tokenId);
    }

    function supportsInterface(
        bytes4 interfaceId
    ) public view override(ERC721, ERC721URIStorage) returns (bool) {
        return super.supportsInterface(interfaceId);
    }
}
This follows most of the same patterns of a normal ERC721 with just one small change: we removed the argument of an address for the initialOwner and instead just directly passed in msg.sender into the Ownable initializer. This was the owner of the contract will be whatever address deployed it, just to keep things simpler. Make sure it works by running npx hardhat compile in the terminal.
In order to deploy this to the Base Sepolia testnet we’ll use the ignition/modules setup included with Hardhat. If you look in that folder you should see a Lock.ts file that you will want to replace with a Pinnie.ts file with the following code.
import { buildModule } from "@nomicfoundation/hardhat-ignition/modules";

const PinnieModule = buildModule("PinnieModule", (m) => {
	const pinnie = m.contract("Pinnie");

	return { pinnie };
});

export default PinnieModule;
Nothing really fancy here, all this module will do is deploy our contract and give us the address. Now we can run the command below to deploy!
npx hardhat ignition deploy ./ignition/modules/Pinnie.ts --network base_sepolia
This triggers the ignition deploy command followed by the path of our Pinnie.ts module, and the --network target base_sepolia. If all goes well you should see the deployed contract address in the terminal. Save that address as we’ll use it soon.
Prep NFTS
Our smart contract is ready to mint some NFTs, however our NFTs aren’t really ready to be NFTs… That’s because a 721 NFT is just a token on the blockchain that has a unique tokenId and a tokenURI. That tokenURI is what defines the life of our NFT, its all the fun information like it’s name, what it’s about, where it’s from, and of course the media like the image we mentioned earlier. The best way to host that data is on IPFS for reasons we’ve covered before, so let’s use the Pinata SDK to upload all of it! Make a new folder in your project called utils and inside there make a file called config.ts. This is going to store both our Pinata and our Viem configs.
import { PinataSDK } from "pinata-web3";
import { createWalletClient, createPublicClient, http } from "viem";
import { privateKeyToAccount } from "viem/accounts";
import { baseSepolia, base } from "viem/chains";
import "dotenv/config";

export const pinata = new PinataSDK({
	pinataJwt: process.env.PINATA_JWT,
	pinataGateway: process.env.PINATA_GATEWAY,
});

export const publicClient = createPublicClient({
	chain: baseSepolia,
	transport: http(),
});

export const walletClient = createWalletClient({
	chain: baseSepolia,
	transport: http(),
});

export const account = privateKeyToAccount(process.env.PRIVATE_KEY_1 as `0x`);
There’s not much going on here other than we setup our new Pinata SDK and some Viem clients which we’ll use shortly. Now let’s make another folder called scripts and in there make a file called upload.ts. We can paste in the following code:
import { pinata } from "../utils/config";
import fs from "node:fs";

(async function upload() {
	const buffer = fs.readFileSync("./pinnie.png");
	const blob = new Blob([buffer]);
	const file = new File([blob], "new-pinnie.png", { type: "image/png" });
	const { IpfsHash } = await pinata.upload.file(file);
	console.log(IpfsHash);
})();
In this code we’ll upload our image which is located at ./pinnie.png but you can use whatever image you want, just make sure the path is right. Alternatively you can upload another way like using an existing URL. Once it’s uploaded it will print out the IpfsHash or CID that we will use in the next step. Run this script with the command npx hardhat run scripts/upload.ts and save that CID.
Mint NFTs
With our image uploaded, we can now finally mint our NFT! To do this we’ll make a new file in scripts called mintNft.ts.
import { account, publicClient, walletClient, pinata } from "../utils/config";
import { abi } from "../artifacts/contracts/Pinnie.sol/Pinnie.json";
import "dotenv/config";

(async function mint() {
	const { IpfsHash: uri } = await pinata.upload.json({
		name: "Pinnie",
		description: "The nicest little Pinnie NFT",
		image: `https://${process.env.GATEWAY_URL}/ipfs/bafkreih5aznjvttude6c3wbvqeebb6rlx5wkbzyppv7garjiubll2ceym4`,
		external_url: "<https://pinata.cloud>",
	});
	console.log(uri);
	const { request } = await publicClient.simulateContract({
		account,
		address: "0x96D8cdBeA42893dE09B2b1c0176FBa4a736367ac",
		abi: abi,
		functionName: "safeMint",
		args: ["0xDeae4091EFca700ddc1E16e6a6F2f021BE75BfFd", `ipfs://${uri}`],
	});
	const tx = await walletClient.writeContract(request);
	console.log(tx);
})();
In this file we import both our Viem items as well as our Pinata SDK instance, as well as the abi from our deployment. If you used another name other than Pinnie.sol for the contract it might be that name instead. In the mint function itself we have two steps. The first is uploading one more file which in this case is a metadata JSON file. This will be the tokenURI, all the info we want to provide about our NFT. We include a name, description, image, and external_url. Most of that is pretty self explanatory, but let’s take a closer look at the image URL. Here we use that GATEWAY_URL from the very beginning that should have the Hot Swaps plugin installed, followed by the /ipfs path, then the CID from our upload step.
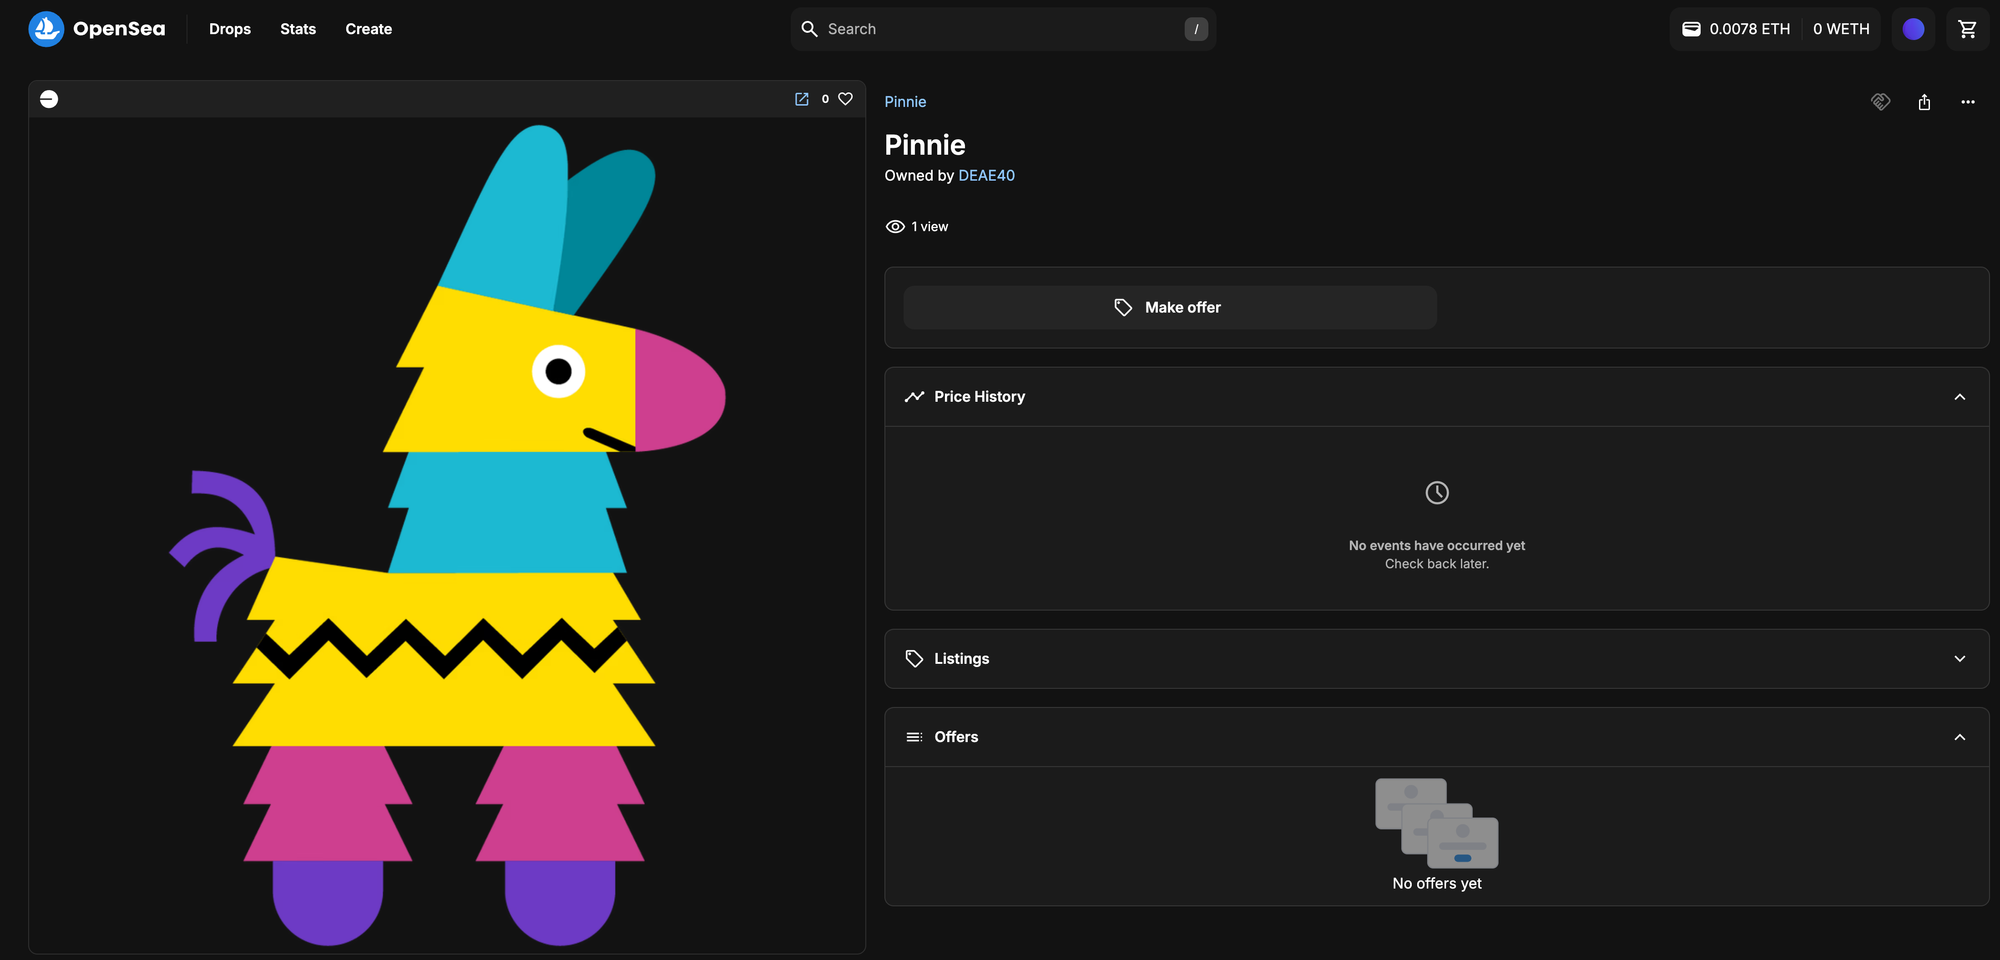
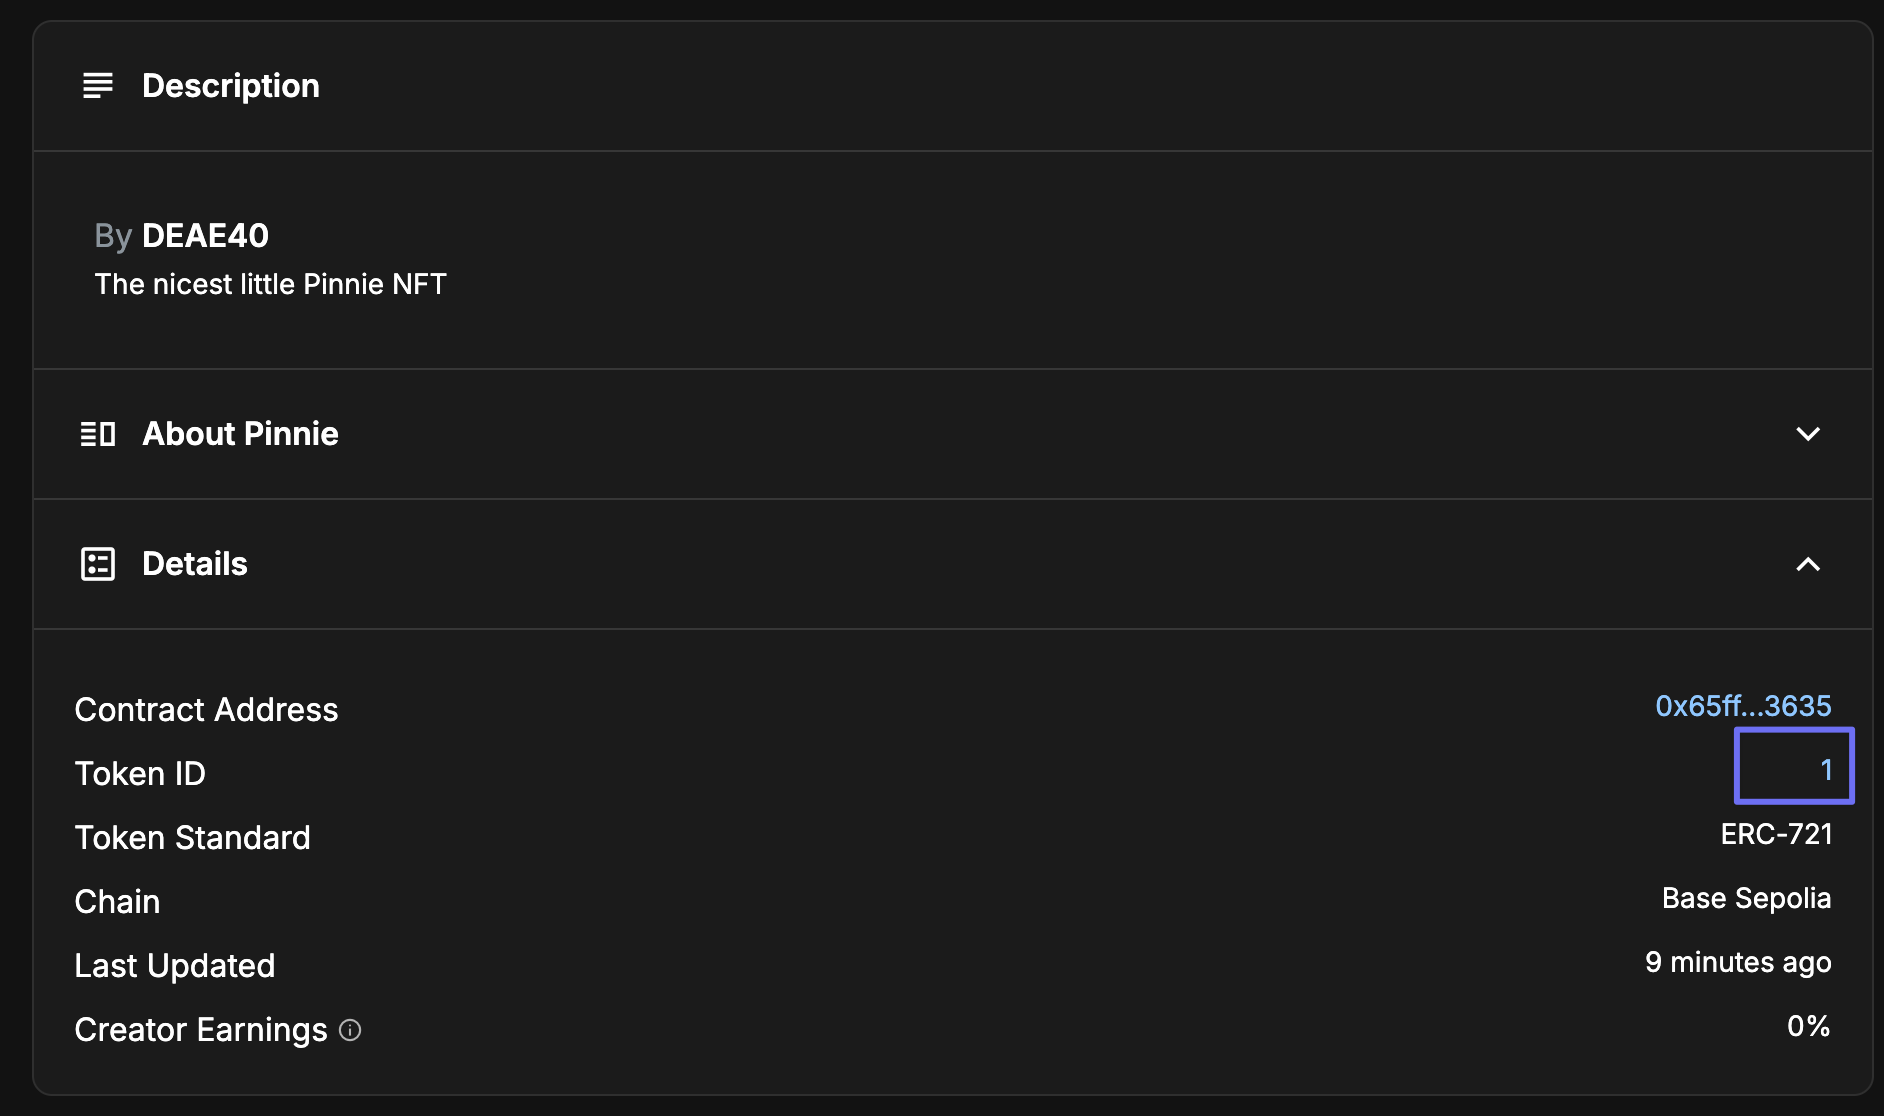
The next step of the function will simulate a contract request, using our local account derived from the PRIVATE_KEY in our config.ts file, the address from our contract deployment, the abi, and the function name safeMint. For the args we pass in the address we want to mint the NFT to, as well as the tokenURI string which in our case is the ipfs:// protocol URL followed by the uri we just created from our metadata upload! Finally we take the request and pass it to our walletClient.writeContract and log out the transaction hash. With all of this in place you should be able to run npx hardhat run scripts/mintNft.ts and get both the URI and the TX hash! You can check to make sure your NFT worked by going to https://testnets.opensea.io/assets/base-sepolia/{YOUR_CONTRACT_ADDRESS}/0 and of course replacing contract field with your own smart contract address. You should see something like this.
Swap NFT Image
With our NFT in place, we can now try out our new Hot Swap feature. Remember, this plugin that is enabled on our Gateway allows us to have one CID as our path in the URL but actually deliver a new CID instead. Right now [https://${process.env.GATEWAY_URL}/ipfs/bafkreih5aznjvttude6c3wbvqeebb6rlx5wkbzyppv7garjiubll2ceym4](https://${process.env.GATEWAY_URL}/ipfs/bafkreih5aznjvttude6c3wbvqeebb6rlx5wkbzyppv7garjiubll2ceym4) leads to the original Pinnie, but in a moment we’ll swap the CID, and the URL will stay the same but the content will change. To do this we need to upload our new Pinnie image, which we can do by going back to upload.ts and changing the file path to the new file.
const buffer = fs.readFileSync("./new-pinnie.png");
Run the same npx hardhat run scripts/upload.ts and you will get a whole new CID. Now make a new file in scripts called swap.ts with the following code.
import { pinata } from "../utils/config";

(async function swapImages() {
	const swap = await pinata.gateways.swapCid({
		// Original CID
		cid: "bafkreih5aznjvttude6c3wbvqeebb6rlx5wkbzyppv7garjiubll2ceym4",
		// New CID
		swapCid: "bafkreielh66qjn2xhg4hhzxrpxugl5xzph4wuqmx34jfszbnbphzc2vjwe",
	});
	console.log(swap);
})();
You can see here we simply just need to provide the original CID that we have as part of our tokenURI and provide the updated image we want to use. Run this script with npx hardhat run sctipts/swap.ts. If successful it should return a record of the update.
{
  mappedCid: 'bafkreielh66qjn2xhg4hhzxrpxugl5xzph4wuqmx34jfszbnbphzc2vjwe',
  createdAt: '2024-08-22T03:53:57.32449Z'
}
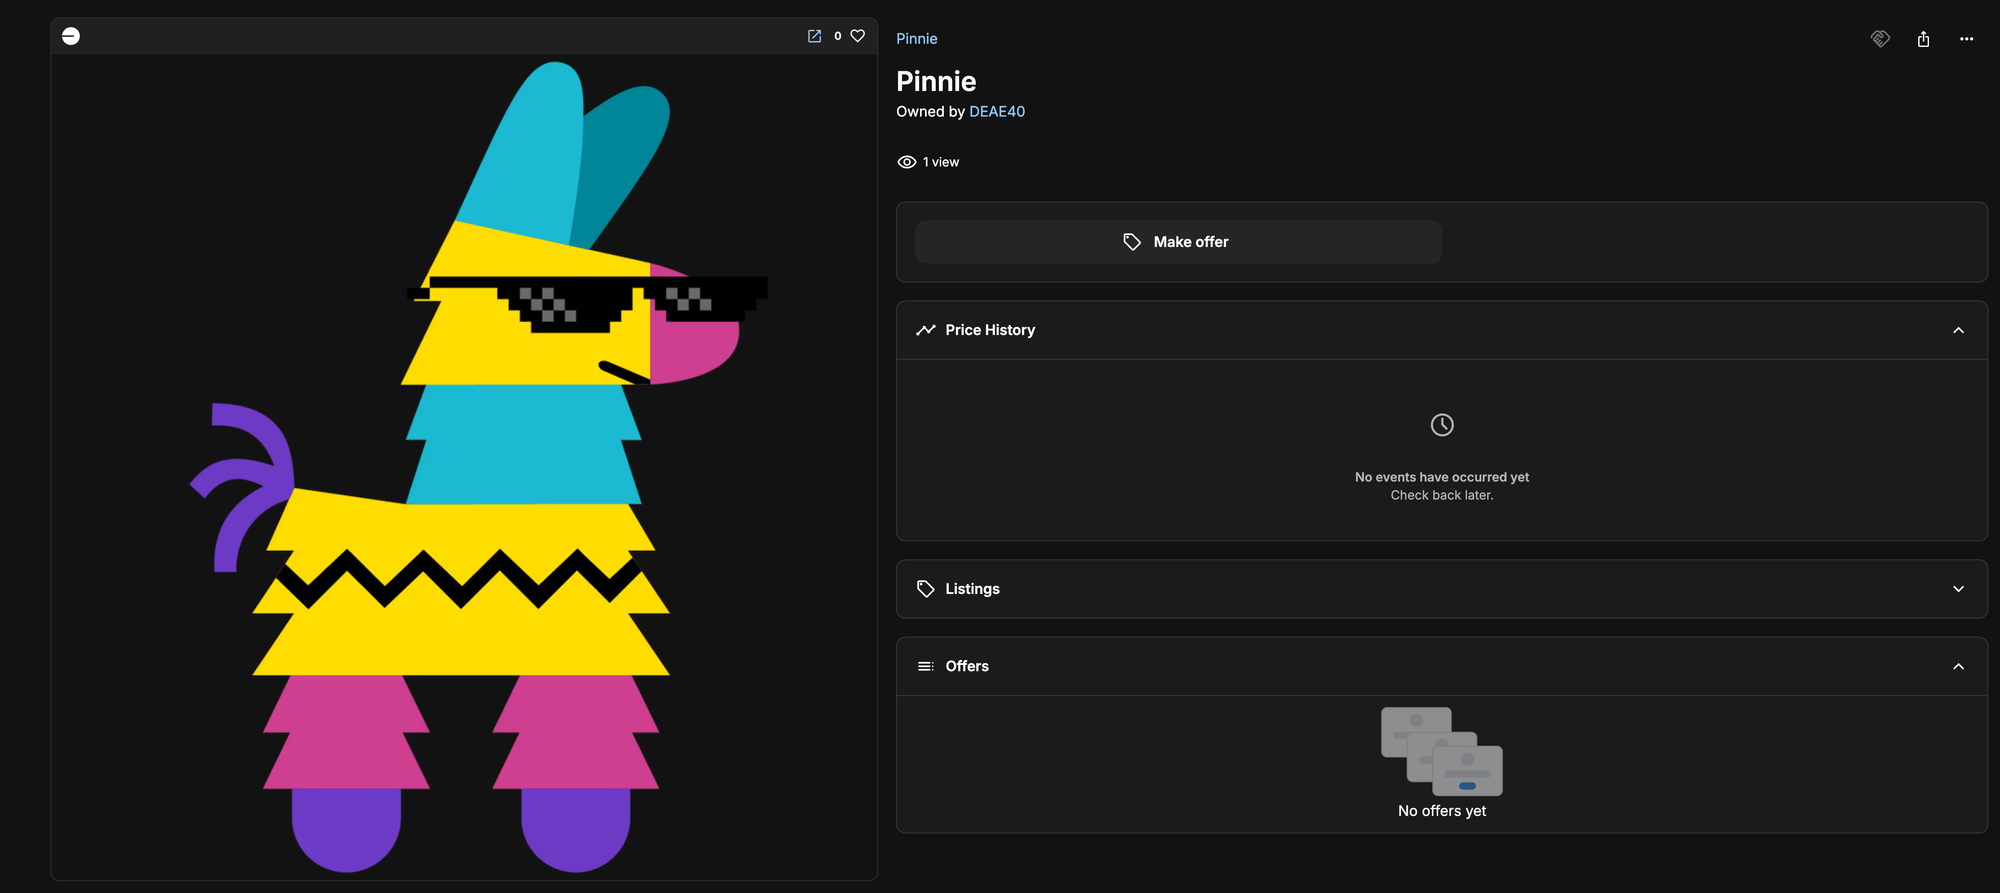
That’s it. We did it. 👀 That easy! If you check OpeSea again we should see the updated NFT, but a quick disclaimer: most marketplaces, wallets, or any other app where you view NFTs, will usually cache media results to handle the massive amounts of NFTs they have to process. This means you might have to do a “Metadata Refresh” on the NFT, and results could vary as to when or how fast this will update. You can always view the source of truth by visiting the tokenURI and clicking on the image link.

Of course you can update an NFT as much as you want using the swap.ts script but you can also undo the swap using a new script called unswap.ts with the following code.
import { pinata } from "../utils/config";

(async function swapImages() {
	const swap = await pinata.gateways.deleteSwap(
		"<ORIGINAL_CID>",
	);
	console.log(swap);
})();
This will simply remove any swap current on the old CID and return it back to normal.
Wrapping Up
As someone who has been working in IPFS for years, I can’t express enough my excitement for Hot Swaps! IPNS tried to accomplish this style of behavior on a protocol and peer to peer layer but ultimately did not scale well. It was far too slow for people to use in a production environment, and those are the kinds of problems Pinata has been solving for years. There are so many other use cases for Hot Swaps and we can’t wait to see what you build.
Happy Pinning!