
Back to blog

How to Migrate Blog Posts From Webflow to Ghost

We’ve been using Webflow for a couple of years now, but we’ve never been happy with the blogging portion of Webflow. It’s always been more work than should be necessary to post and published a well-formatted technical blog. Because content is our number one driver of traffic, and because we produce so much of it, we decided to start exploring alternatives.
I’ve personally always been a fan of Ghost. I’ve used it off and on for about a decade now, so it was a top candidate when we started looking for solutions. After confirming that we’d be able to match the URL format of our posts in Webflow with Ghost and confirming we wouldn’t kill our SEO, we decided to make the move. There were a few steps in this process, but the biggest of them all was migrating nearly 200 blog posts from Webflow to Ghost. Ghost doesn’t have a native import tool for Webflow, and Webflow doesn’t export data in a format that works with Ghost’s JSON importer. So, we do what we do best here.
We wrote code.
Well, actually, first we Googled. Unfortunately, there weren’t any guides that we could find on migrating blog content from Webflow to Ghost. That meant we’d have to turn to the Ghost and Webflow documentation sites and see what we could pull off. This guide will help if you ever want to make a similar migration.
Building the Migration Tool
I started this process with the ambitious goal of writing the migration script in Go, but then reality hit and I remembered we were on a time crunch. So, Gophers, sorry to disappoint, but this guide is for the JavaScript fans. Ultimately, I wrote the script in TypeScript and used Node.js.
For this guide, you’ll need a few things:
- A text editor to write your code in
- Node.js installed on your device (newest long-term support version is best)
- Optionally, a Pinata account to upload images to IPFS
For the Pinata account, you can sign up for free here. If you don’t choose to use Pinata, you’ll either want to find another hosting provider or you’ll have to change up the image handling script a bit (we’ll talk about that when we get there). But you probably don’t want all of your image references to point to Webflow’s CDN in the event you cancel your service with them.
Ok, let’s get started. Fire up your text editor and launch your command line terminal. Let’s start by creating a project folder:
mkdir webflow-to-ghost && cd webflow-to-ghost
Now that you have a folder, and you’ve changed into it, let’s initialize the project. Run the following commands:
npm init -y && npm i typescript --save-dev
This will initialize npm in your project so that we can install node modules and it will install typescript as a developer dependency. Next, we need to create a config file for TypeScript. To do that, we should run this command:
npx tsc --init
Now, if you open your project folder in your text editor, you’ll see you have a tsconfig.json file. There are a lot of settings you can adjust in that file, but we’re only going to adjust one right now. Find the commented out property of outDir. Uncomment that and change the value from ./ to ./dist. You’ll need to create a dist folder in the root of your project to support this.
We just told the TypeScript compiler to output the compiled JavaScript files into the dist folder. This keeps things clean because, if you ran this on the root of your project without changing the configuration file, you’d have TypeScript and JavaScript files mixed together which can be confusing.
Now that we’re all set up to work with TypeScript, let’s start writing some code. In the root of your file, let’s add a types.ts file. That’s right, we’re going to make life easy on ourselves by defining our types up front. In that file, we need to define the shape of the eventual JSON we will have for our Webflow blog posts, the shape of posts as Ghost expects them, and if you’re using Pinata to upload your images, the format of the upload response. You can copy and paste all of this into your types.ts file:
export type Post = {
  "Title - Blog Post": string;
  "Link - Blog Post": string;
  "Collection ID": string;
  "Item ID": string;
  "Created On": string;
  "Updated On": string;
  "Published On": string;
  "Thumbnail - Blog Homepage": string;
  "Image - Blog Post": string;
  "Image caption - Blog Post": string;
  "Meta Description - Blog Post": string;
  "Short Description - Blog Post": string;
  "Feature sentence - Blog Post (Plain text)": string;
  "Feature sentence - Visible?": boolean;
  "Blog Content - Rich Text": string;
  "Date - Blog Post": string;
  "Category Tag - Blog Post": string;
  "Category Filters - Blog Homepage": string;
  "Multi-Reading Lists": string;
  "Author - Blog Post": string;
  "Read Time - Blog Post": number;
  "Is Featured?": boolean;
  "Is recomended?": boolean;
};

interface Tag {
  created_at: string;
  description: string | null;
  feature_image: string | null;
  id: string;
  meta_description: string | null;
  meta_title: string | null;
  name: string;
  slug: string;
  updated_at: string;
  url: string;
  visibility: string;
}

interface Role {
  id: string;
  name: string;
  description: string;
  created_at: string;
  updated_at: string;
}

interface Author {
  id?: string;
  name?: string;
  slug?: string;
  email?: string;
  profile_image?: string;
  cover_image?: string | null;
  bio?: string | null;
  website?: string;
  location?: string;
  facebook?: string;
  twitter?: string;
  accessibility?: string | null;
  status?: string;
  meta_title?: string | null;
  meta_description?: string | null;
  tour?: string | null;
  last_seen?: string | null;
  created_at?: string;
  updated_at?: string;
  roles?: Role[];
  url?: string;
}

interface Newsletter {
  id: string;
  name: string;
  description: string | null;
  slug: string;
  sender_name: string;
  sender_email: string | null;
  sender_reply_to: string;
  status: string;
  visibility: string;
  subscribe_on_signup: boolean;
  sort_order: number;
  header_image: string | null;
  show_header_icon: boolean;
  show_header_title: boolean;
  title_font_category: string;
  title_alignment: string;
  show_feature_image: boolean;
  body_font_category: string;
  footer_content: string | null;
  show_badge: boolean;
  created_at: string;
  updated_at: string;
  show_header_name: boolean;
  uuid: string;
}

interface Email {
  id: string;
  uuid: string;
  status: string;
  recipient_filter: string;
  error: string | null;
  error_data: string;
  email_count: number;
  delivered_count: number;
  opened_count: number;
  failed_count: number;
  subject: string;
  from: string;
  reply_to: string;
  html: string;
  plaintext: string;
  track_opens: boolean;
  submitted_at: string;
  created_at: string;
  updated_at: string;
}

interface PrimaryTag {
  id: string;
  name: string;
  slug: string;
  description: string | null;
  feature_image: string | null;
  visibility: string;
  meta_title: string | null;
  meta_description: string | null;
  created_at: string;
  updated_at: string;
  og_image: string | null;
  og_title: string | null;
  og_description: string | null;
  twitter_image: string | null;
  twitter_title: string | null;
  twitter_description: string | null;
  codeinjection_head: string | null;
  codeinjection_foot: string | null;
  canonical_url: string | null;
  accent_color: string | null;
  parent: string | null;
  url: string;
}

export interface GhostPost {
  slug: string;
  id?: string;
  uuid?: string;
  title: string;
  lexical?: string;
  html: string;
  comment_id?: string;
  feature_image?: string;
  feature_image_alt?: string | null;
  feature_image_caption?: string | null;
  featured?: boolean;
  status: string;
  visibility?: string;
  created_at: string;
  updated_at: string;
  published_at: string;
  custom_excerpt: string | null;
  codeinjection_head?: string | null;
  codeinjection_foot?: string | null;
  custom_template?: string | null;
  canonical_url?: string | null;
  tags: string[];
  authors: string[];
  primary_author: string;
  primary_tag: string;
  url?: string;
  excerpt: string;
  og_image: string | null;
  og_title: string | null;
  og_description: string | null;
  twitter_image: string | null;
  twitter_title: string | null;
  twitter_description: string | null;
  meta_title: string | null;
  meta_description: string | null;
  email_only?: boolean;
  newsletter?: Newsletter;
  email?: Email;
}

export type PinataUploadResponse = {
  "IpfsHash":string;
  "PinSize": number;
  "Timestamp": string;
  "isDuplicate": boolean;
}
Ok, great, now let’s create an index.ts file. Inside that file, we’ll kick off this whole process by reading from our JSON file of blog posts from Webflow (don’t worry, I’ll show you how to get that soon). Add the following to your index.ts file:
const readWebflowFiles = async () => {
  try {
    const file = fs.readFileSync("./blogposts.json", "utf-8");
    const posts = JSON.parse(file);
    return posts;

    console.log("Done!");
  } catch (error) {
    console.log(error);
    throw error;
  }
};

(async () => {
  try {
    const posts = await readWebflowFiles();
    process.exit(0);
  } catch (error) {
    console.log(error);
    process.exit(1);
  }
})();
You can see at the bottom of the file, we have a self-initializing function that calls the readWebflowFiles() function. That function should read from our JSON file called blogposts.json and return the parsed array of Webflow posts.
Now, we already know we will need to convert the format of the Webflow posts into a format that Ghost’s API understands, so let’s write a function that does that and kicks up the upload process. Add a function in your index.ts file called shapeAndPostToGhost:
const shapeAndPostToGhost = async (posts: Post[]) => {
  try {
    for (const post of posts.filter((p: Post) => p["Published On"] != "")) {
      try {
        const ghostPost = await shapePostForGhost(post);
        console.log(ghostPost.title);
        await addPostsToGhost(ghostPost);
      } catch (error) {
        console.log("POST ERROR")
        console.log(error);
        console.log(post);
        throw error;
      }
    }
  } catch (error) {
    console.log(error)
    throw error;
  }
}
You’ll also need to update your initialization function to call this new shapeAndPostToGhost function like so:
(async () => {
  try {
    const posts = await readWebflowFiles();
    await shapeAndPostToGhost(posts);
    console.log("Done!")
    process.exit(0);
  } catch (error) {
    console.log(error);
    process.exit(1);
  }
})();
Now, if you look at the shapeAndPostToGhost function, you can see we’re taking each of the Webflow posts and running it through a function called shapePostForGhost and then we are uploading the result through a function called addPostToGhost. Let’s write each of those functions. First, add the shapePostForGhost function:
export const shapePostForGhost = async (post: Post) => {
  const image_url = (await postImageToPinata(post["Image - Blog Post"])) || "";
  const ghostPost = {
    slug: post["Link - Blog Post"],
    title: post["Title - Blog Post"],
    html: await processImagesInHTML(post["Blog Content - Rich Text"]),
    feature_image: image_url,
    status: "published",
    created_at: new Date(post["Created On"]).toISOString(),
    updated_at: new Date(post["Updated On"]).toISOString(),
    published_at: new Date(post["Created On"]).toISOString(),
    custom_excerpt: post["Feature sentence - Blog Post (Plain text)"],
    tags: [post["Category Tag - Blog Post"]],
    authors: [getEmailFromWebflowAuthor(post["Author - Blog Post"])],
    primary_author: getEmailFromWebflowAuthor(post["Author - Blog Post"]),
    primary_tag: post["Category Tag - Blog Post"],
    excerpt: post["Feature sentence - Blog Post (Plain text)"],
    og_image: image_url,
    og_title: post["Title - Blog Post"],
    og_description: post["Feature sentence - Blog Post (Plain text)"],
    twitter_image: image_url,
    twitter_description: post["Feature sentence - Blog Post (Plain text)"],
    twitter_title: post["Title - Blog Post"],
    meta_title: post["Title - Blog Post"],
    meta_description: post["Feature sentence - Blog Post (Plain text)"],
  };

  return ghostPost;
};
There are some interesting ‘gotchas’ in this function, so let’s run through them. First, there’s the image_url variable. It’s set by calling a function called postImageToPinata. Much like the images in the Webflow posts HTML, you’ll likely have featured images that are hosted on Webflow’s CDN. This function simply uploads those to Pinata and returns a new URL to access the images from.
Next, you’ll notice that the html property maps to a function called processImagesInHTML. Remember, there are image links from Webflow in the HTML of your posts. It probably makes sense to get those images hosted elsewhere. This function, as you’ll see soon, parses the HTML, finds the image links, uploads the images to Pinata, then returns the updated HTML string for use in the Ghost post object.
Then, there’s the published_at property. When I was first testing this, I set this to map to Webflow’s Published On property. That was a mistake. Webflow updates this value every time you make a change to your blog posts. So if you correct a typo six months after initially publishing, the Published On date gets set to today. The closest approximation we have for the actual publication date is the Created On property from Webflow, so we map that to Ghost’s published_at field.
Finally, the last ‘gotcha’ is that in Webflow, you’re going to get the author’s identifier, not their email address. The email address is what Ghost’s API uses to associate an author. So, we need a function to map the identifier to an email address.
Let’s write all of these functions now. First, create the postImageToPinata like this:
export default async function postImageToPinata(url: string) {
  try {
    const urlStream = await fetch(url);
    const arrayBuffer = await urlStream.arrayBuffer();
    const blob = new Blob([arrayBuffer]);
    const file = new File([blob], "file");
    const data = new FormData();
    data.append("file", file);

    const upload = await fetch(
      "<https://api.pinata.cloud/pinning/pinFileToIPFS>",
      {
        method: "POST",
        headers: {
          Authorization: `Bearer ${process.env.PINATA_JWT}`,
        },
        body: data,
      }
    );
    const uploadRes: any = await upload.json();
    return `${process.env.PINATA_GATEWAY}/ipfs/${uploadRes?.IpfsHash}` || "";
  } catch (error) {
    console.log(error);
  }
}
We’ll use this as a standalone function to upload feature images, but you’ll see that this function gets re-used soon. Like, right now.
Go ahead and create the processImagesInHTML function like this:
async function processImagesInHTML(html: string) {
  // Find images that Ghost Upload supports
  let imageRegex = /="([^"]*?(?:\\.jpg|\\.jpeg|\\.gif|\\.png|\\.svg|\\.sgvz))"/gmi;
  let result;

  while ((result = imageRegex.exec(html)) !== null) {
    let file = result[1];
    const url = await postImageToPinata(file);
    html = html.replace(file, url || "");
  }

  return html;
}
This is where, if you’re not using Pinata and you want to upload to another service or upload directly to Ghost, you’ll need to modify the script. The postImageToPinata function creates a buffer from the URL. If you want to upload to Ghost you’ll need to convert that or you’ll need to write the file to disk then upload. I’ll leave that up to you because this is a Pinata blog and we’re uploading to Pinata here!
Now let’s write our author mapping function. I’m going to use fake identifiers, but you’ll need to get all of the identifiers from your Webflow export and map them to your authors’ emails. The function should look like this:
const getEmailFromWebflowAuthor = (author: string) => {
  if (author === "joe-smith") {
    return "[email protected]";
  }
  if (author === "jane-doe") {
    return "[email protected]";
  }
  return "[email protected]";
};
I have a catch-all at the end. You may have employees who aren’t with the company that wrote blogs or something else might make it so an author in Webflow doesn’t map to your new publication. In that case, you can create an account for your catch-all email in Ghost and that will be the default author if not other author is found.
Ok, so we’ve shaped the post, but now we need to actually post it to Ghost’s API. Luckily, Ghost has a JavaScript SDK that can help us. Let’s install that now:
npm i @tryghost/admin-api
We have to use the admin-api because we aren’t just reading from the API, we’re writing from it. Unfortunately, Ghost’s SDK doesn’t support types yet, and I don’t have the time to write my own declaration file, so we’re going to tell TypeScript to ignore the lack of types. Add the following to the top of your index.ts file:
//  @ts-ignore
import GhostAdminAPI from'@tryghost/admin-api';
Before we can write the code to upload to the API, we need to do a few things. First, we need to get an Admin API key from Ghost. To do that, you’ll want to go into your Ghost dashboard, into settings, then find the Integrations option. From there, create a custom integration and give it a name.
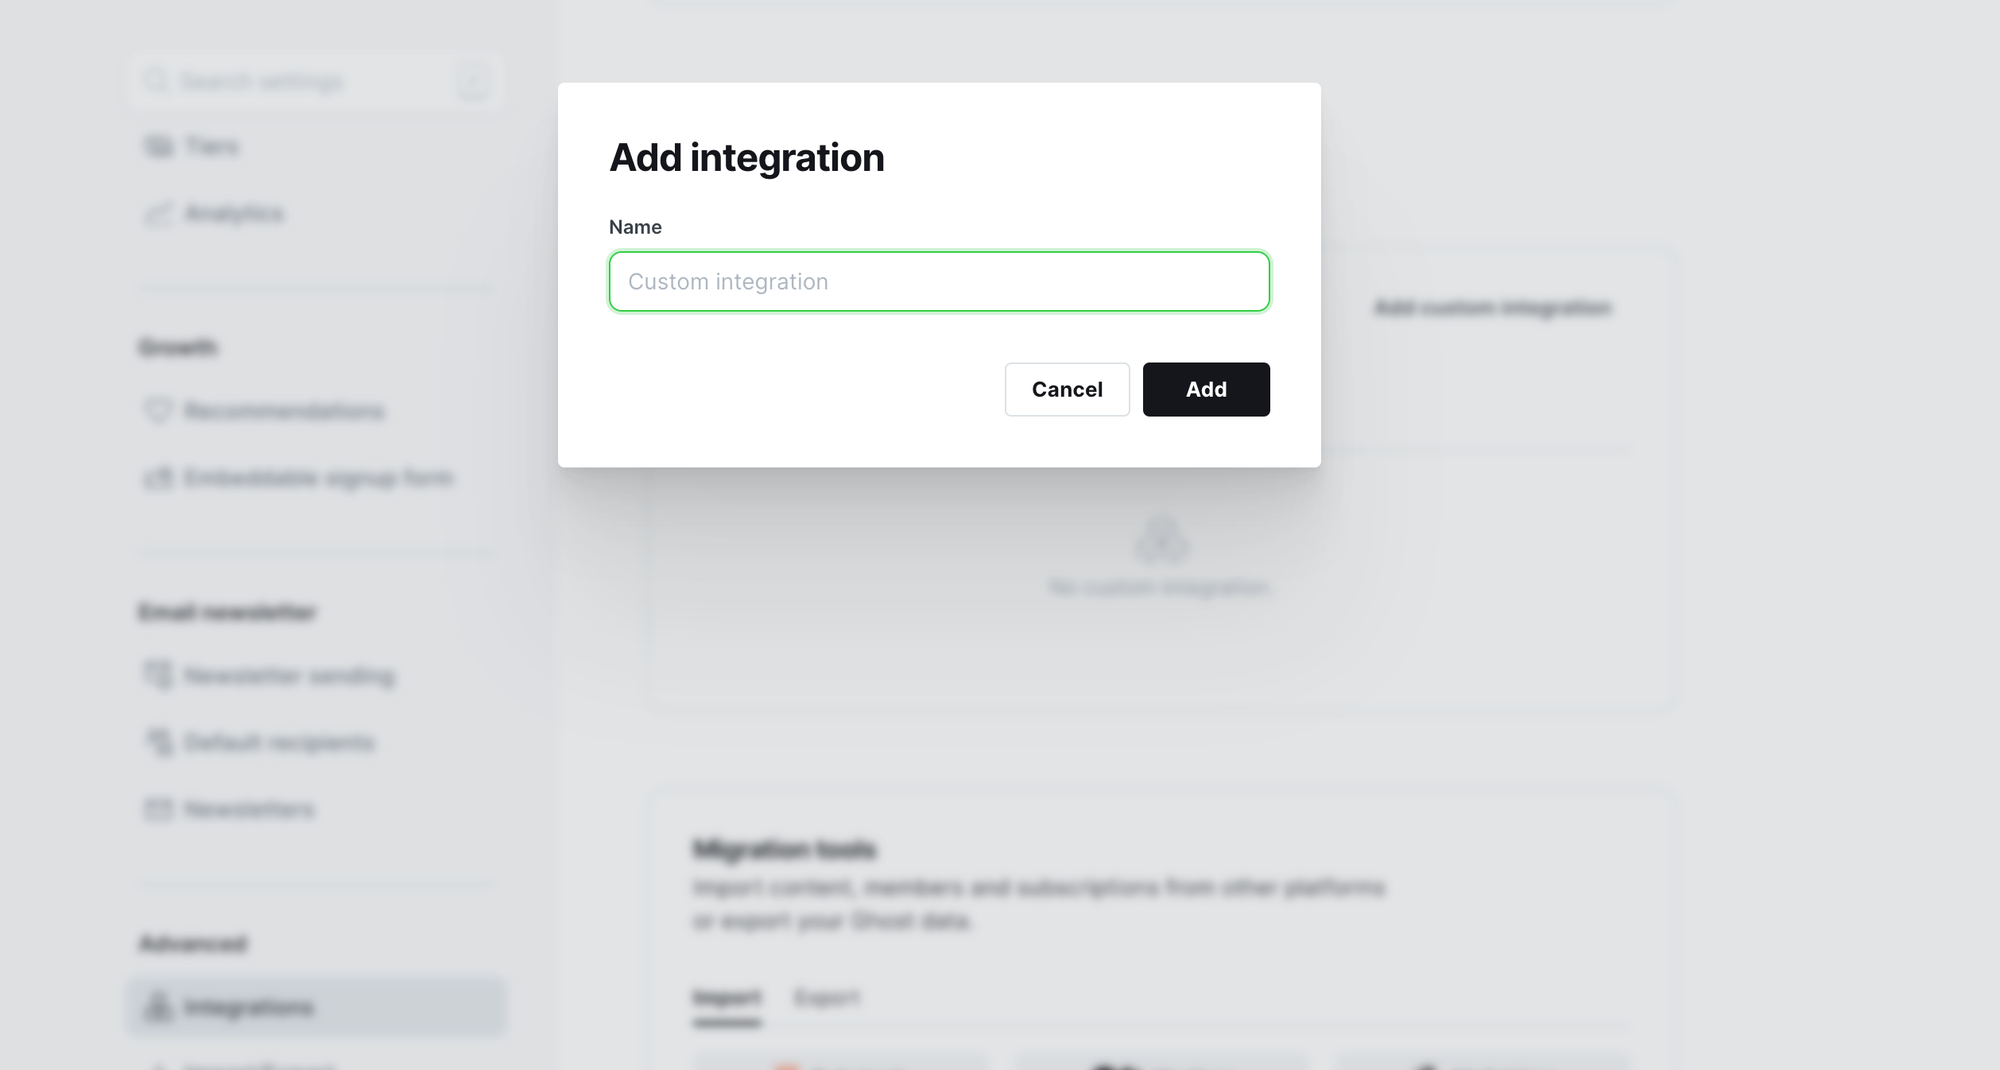
When you’re done, there will be a Content API Key and an Admin API Key. We need the Admin Key, so copy that and then create a .env file in your project’s root. Add the admin key like this:
ADMIN_KEY=Your admin key
Like with anytime you add secrets to a project, be sure to ‘gitignore’ them. Create a .gitignore file, if you don’t have one already, and add the .env file as ignored.
Ok, so we’re getting close, but we still can’t just use that Admin Key. We need to turn it into a JWT that can be used as part of our API requests to Ghost. So, let’s install a couple more dependencies.
npm i jsonwebtoken dotenv
We’ll need jsonwebtoken to help us sign the JWT we’re going to use, and we need dotenv to read our .env file.
Now, head back over to your index.ts file, and add the following imports at the top:
import GhostAdminAPI from'@tryghost/admin-api';
import jwt from "jsonwebtoken";
import dotenv from "dotenv";
import { GhostPost, Post } from "./types";
dotenv.config();
I snuck one in there that is necessary. We never imported our types, but we need that for our code to compile. The other imports all help power the JWT signing and the API requests. Let’s first create a signed token and initialize the Ghost API client. Below your imports, add:
const key = process.env.ADMIN_KEY!;

// Split the key into ID and SECRET
const [id, secret] = key.split(":");

// Create the token (including decoding secret)
let token;
try {
  token = jwt.sign({}, Buffer.from(secret, "hex"), {
    keyid: id,
    algorithm: "HS256",
    expiresIn: "5m",
    audience: `/admin/`,
  });
} catch (error) {
  console.log("jwt error");
  throw error;
}

const api = new GhostAdminAPI({
  url: "<http://localhost:2368>",
  key: process.env.ADMIN_KEY,
  version: "v5.0",
});
Now, we’re ready to write our upload function. Add the following function in your index.ts file:
export const addPostsToGhost = async (post: GhostPost) => {
  try {
    await api.posts.add(post, {source: 'html'});
  } catch (error) {
    console.log(error);
    throw error;
  }
};
Notice that we add a configuration object in the SDK call specifying our source as HTML. Ghost defaults to a format called ‘lexical’ and, if you don’t explicitly set the source to HTML, your post body will be blank.
The last thing we have left to do is export our content from Webflow and converting it to JSON. We could write a script to convert the CSV from Webflow to JSON, but unless you have sensitive data in there, you might just want to use an existing online tool.
Here’s a guide from Webflow on exporting your posts into a CSV. Once you have that, you can use any online CSV to JSON converter you feel comfortable with. Once you have the JSON file, add it to the root of your project and be sure to name it blogposts.json.
Guess what? That’s it. You can now compile your code and run it like this:
npx tsc
Then:
node dist/index.js
You’ll see the title of each post as it’s being uploaded. If there are errors, they will be printed in the terminal. When the process is done, you’ll see the word “Done!” printed. When that happens, you can check out your Ghost admin panel and you’ll see all of your posts.
Wrapping Up
This wasn’t the typical Pinata tutorial, but we did make use of IPFS in this post. I didn’t find much content out there when migrating our blog from Webflow, so hopefully, if you find yourself needing to do a similar migration, this is helpful.
Happy Blogging!