
Back to blog

How to Build an App that Signs & Verifies Content

We’re being fooled every day by AI spam. Determining if something is real or fake is getting harder. Despite all its benefits, AI is creating new challenges for developers and platforms.
Pinata is taking steps towards solving this problem by enabling Signatures with our Content Addressable Attestation Gateway Plugin. With the Pinata API, you can add an EIP-712 signature to a CID, adding a layer of verifiability on a cryptographic level. The CID is a content addressable hash that ensures the content is what it’s supposed to be, and the signature adds a point of origin from a crypto address. With the Content Addressable Plugin, you can retrieve these CIDs and have the signature included in the response headers, providing a way to verify content upon retrieval.
To show what this unlocks, we built an app called SIGNETS. Much like a signet ring, which is used to stamp wax-made identity onto a piece of paper, this app allows users to connect their wallet (or make one through Privy), upload content, and sign it. Once complete, the user is given a link they can share with anyone, and the receiving party can verify the content signature by providing the author’s wallet address. You can imagine this being useful for, say, a journalist reporting on a sensitive issue where they need to ensure their publisher can verify it’s their article and not a fraudulent one. Cryptography signatures enable this, and Web3 has put this power into the hands of millions through crypto wallets. In this tutorial, we’ll show you how to make a barebones version of SIGNETS using the Pinata API and Content Addressable Plugin
Setup
To build this project, we’ll need a few things, but first let’s start by creating our repo. In the terminal, run npx create-next-app@latest signets-clone and select all the default options. Then run cd signets-clone to move into that repository.
Pinata
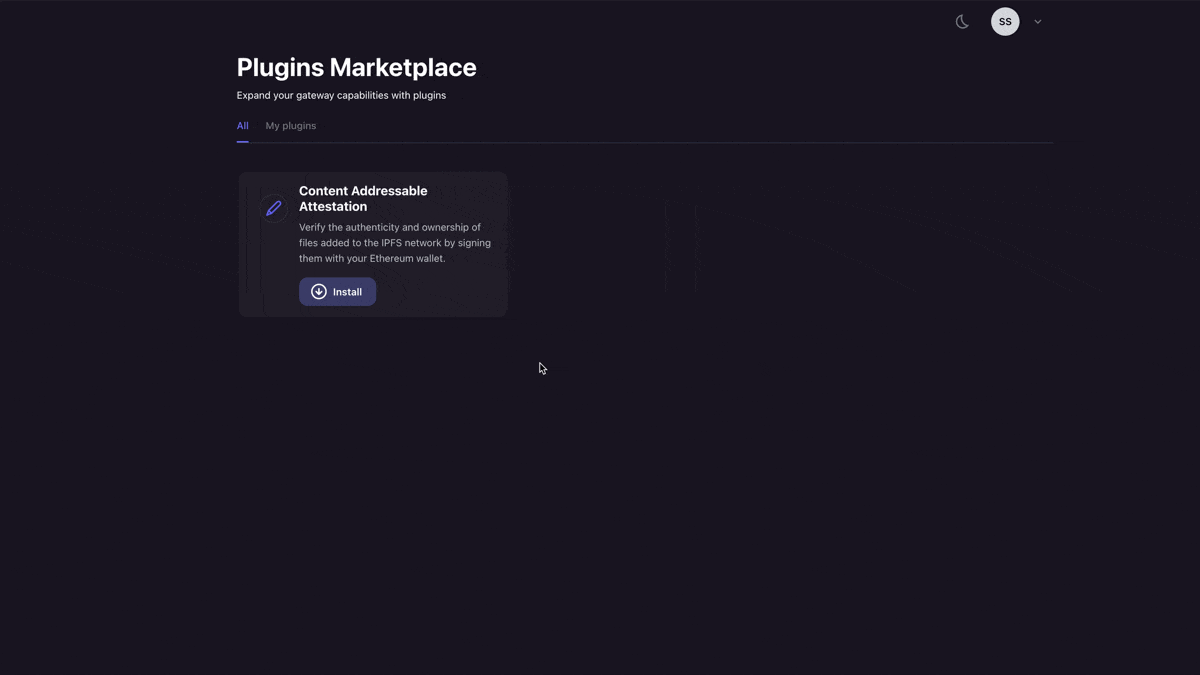
Next, you will want to make a free account on Pinata with this link here. Once your account is created, we can make an API key by navigating to the keys page and clicking “New Key” in the top right. For now, I would recommend giving it admin rights with unlimited uses. Once you’ve created it, save all the API key information somewhere safe, as it is only shown once. Now, we will want to get our gateway set-up. First, visit the gateways page, copy the domain in the format https://turquoise-legitimate-fowl-228.mypinata.cloud, and put that where you stored your API keys. Then, we need to install the Content Addressable Plugin to our gateway. You can do this by going to the “Marketplace” tab on the left side, locating the Content Addressable plugin, then clicking “install”.
If you have multiple gateways, it will give you the option to choose which one you want to install to. Once you confirm that, then you are all set! Back in our project repo, you will want to go ahead and make a file in the root folder called .env.local and put in the following variables:
PINATA_JWT= # this would be the longer JWT key from when you made your Pinata API key
NEXT_PUBLIC_GATEWAY_URL= # this is the gateway domain we copied earlier, including the prefix https://
Privy
To handle our wallet connections, we’re going to use Privy, one of the best options out there for Web3 auth. You can make a free account here and make a new app, giving it a name and choosing the Web App environment. Then, you will want to click the first card of their checklist to get your API keys. The first one you’ll need is the App ID at the top, and the next one you’ll want to get is the App’s Verification key, which you can see by clicking the “Verify with key instead” toggle. Now we can put both of these variables into our .env.local file.
PINATA_JWT=...
NEXT_PUBLIC_GATEWAY_URL=...
NEXT_PUBLIC_PRIVY_APP_ID= # the App ID we got from the top
PRIVY_VERIFICATION_TOKEN= # the verification token from the toggle
With the keys set-up, we can get the code set-up for Privy as well. To start, run the following command in the terminal:
npm install @privy-io/react-auth@latest
Once it’s installed, we will want to make a new folder at the root called components and make a new file called providers.tsx inside of it. In there, we will just paste in the code below.
"use client";

import { PrivyProvider } from "@privy-io/react-auth";

export default function Providers({ children }: { children: React.ReactNode }) {
  return (
    <PrivyProvider
      appId={`${process.env.NEXT_PUBLIC_PRIVY_APP_ID}`}
      config={{
        appearance: {
          theme: "light",
          accentColor: "#000000",
          logo: "<https://youlogolink>",
        }
      }}
    >
      {children}
    </PrivyProvider>
  );
}
Now we will want to open the app/layout.tsx file and import our provider there.
import type { Metadata } from "next";
import { Inter } from "next/font/google";
import "./globals.css";
import Providers from "@/components/providers";

const inter = Inter({ subsets: ["latin"] });

export const metadata: Metadata = {
  title: "Create Next App",
  description: "Generated by create next app",
};

export default function RootLayout({
  children,
}: Readonly<{
  children: React.ReactNode;
}>) {
  return (
    <html lang="en">
      <body className={inter.className}>
        <Providers>{children}</Providers>
      </body>
    </html>
  );
}
With the provider set-up, we can start using Privy! To do that, let’s make a new component called login-button.tsx in the components folder.
"use client";

import { usePrivy } from "@privy-io/react-auth";

export function LoginButton() {
  const { ready, authenticated, login } = usePrivy();
  // Disable login when Privy is not ready or the user is already authenticated
  const disableLogin = !ready || (ready && authenticated);

  return (
    <button
      className="border-2 border-black p-2 rounded-md"
      type="submit"
      disabled={disableLogin}
      onClick={login}
    >
      {authenticated ? "Logged In" : "Login"}
    </button>
  );
}
Let’s import the button into our page.tsx file so a user can login and view our UploadForm that we’re about to build.
"use client";

import { usePrivy } from "@privy-io/react-auth";
import { LoginButton } from "@/components/login-button";
import { UploadForm } from "@/components/upload-form";

export default function Home() {
  const { ready, authenticated } = usePrivy();

  return (
    <main className="flex min-h-screen flex-col items-center justify-center gap-12 p-24">
      <h1>Upload and Verify</h1>
      <LoginButton />
      {ready && authenticated && <UploadForm />}
    </main>
  );
}
Uploading and Signing
With a connected wallet in place, we can now move to our upload and signing feature. To start, let’s make a file called upload.ts in utils and put the following code in.
export const generatePinataKey = async (accessToken: string | null) => {
  try {
    const tempKey = await fetch("/api/key", {
      method: "GET",
      headers: {
        Authorization: `Bearer ${accessToken}`,
        "Content-Type": "application/json",
      },
    });
    const keyData = await tempKey.json();
    return keyData;
  } catch (error) {
    console.log("error making API key:", error);
    throw error;
  }
};

export async function uploadFile(selectedFile: any, keyToUse: string, name?: string) {
  try {
    const formData = new FormData();
    formData.append("file", selectedFile);

    if (name) {
      formData.append("pinataMetadata", JSON.stringify({ name: name }));
    }

    const options = JSON.stringify({
      cidVersion: 1,
    });
    formData.append("pinataOptions", options);

    const uploadRes = await fetch("<https://api.pinata.cloud/pinning/pinFileToIPFS>", {
      method: "POST",
      headers: {
        Authorization: `Bearer ${keyToUse}`,
      },
      body: formData,
    });
    if (uploadRes.status !== 200) {
      throw Error;
    }
    const uploadResJson = await uploadRes.json();
    console.log(uploadResJson);
    return uploadResJson;
  } catch (error) {
    console.log("Error uploading file:", error);
  }
}
In this file, we have two functions. The latter is an uploadFile function which takes a file as well as a keyToUse which is where we can use a scoped, one-time used JWT. By taking a “signed JWT” approach, we can upload from the client side without worrying about exposing our primary key. To get this key, we use the generatePinataKey, which makes an API call to our server side code. Let’s setup that API route now by creating the following file: app/api/key/route.ts
import { type NextRequest, NextResponse } from "next/server";
const { v4: uuidv4 } = require("uuid");
const pinataJWT = process.env.PINATA_JWT;
import { verifySession } from "@/utils/session";

export const dynamic = "force-dynamic";

export async function GET(req: NextRequest, res: NextResponse) {
  const authToken = req?.headers?.get("authorization")?.replace("Bearer ", "") || "";

  const verified = await verifySession(authToken);
  if (!verified) {
    return new Response("Unauthorized", { status: 401 });
  }
  try {
    const uuid = uuidv4();
    const body = JSON.stringify({
      keyName: uuid.toString(),
      permissions: {
        endpoints: {
          pinning: {
            pinFileToIPFS: true,
          },
        },
      },
      maxUses: 1,
    });
    const keyRes = await fetch("<https://api.pinata.cloud/v3/pinata/keys>", {
      method: "POST",
      body: body,
      headers: {
        accept: "application/json",
        "content-type": "application/json",
        authorization: `Bearer ${pinataJWT}`,
      },
    });
    const keyResJson = await keyRes.json();
    const keyData = {
      pinata_api_key: keyResJson.pinata_api_key,
      JWT: keyResJson.JWT,
    };
    return NextResponse.json(keyData, { status: 200 });
  } catch (error) {
    console.log(error);
    return NextResponse.json({ text: "Error creating API Key:" }, { status: 500 });
  }
}
This API route will make a temporary API key that can only do pinFileToIPFS , has maxUses set to just 1, and returns it to our client. To make sure only authorized users can make this API call, we use a session token from Privy in combination with a verifySession function. Let’s make that file under utils/session.ts and put in the code below.
import * as jose from "jose";
const PRIVY_APP_ID = process.env.NEXT_PUBLIC_PRIVY_APP_ID as string;

const PRIVY_PUBLIC_KEY =
  `-----BEGIN PUBLIC KEY-----${process.env.PRIVY_VERIFICATION_TOKEN}-----END PUBLIC KEY-----` ||
  "";

export const verifySession = async (token: string) => {
  try {
    const verificationKey = await jose.importSPKI(PRIVY_PUBLIC_KEY, "ES256");
    const payload = await jose.jwtVerify(token, verificationKey, {
      issuer: "privy.io",
      audience: PRIVY_APP_ID,
    });
    //  Verify that the sub matches app id
    if (payload?.payload?.aud?.includes(PRIVY_APP_ID)) {
      return true;
    }
    return false;
  } catch (error) {
    console.log(error);
    return false;
  }
};
Ok, so, we have everything we need to make our upload form. Make a new file called upload-form.tsx in the components folder with this code.
"use client";

import { generatePinataKey, uploadFile } from "@/utils/upload";
import { getAccessToken } from "@privy-io/react-auth";
import { useState } from "react";

export function UploadForm() {
  const [selectedFile, setSelectedFile] = useState();
  const [loading, setLoading] = useState(false);
  const [cid, setCid] = useState("");

  function fileHandler(event: any) {
    const file = event?.target?.files[0];
    setSelectedFile(file);
  }

  async function submitHandler() {
    try {
      setLoading(true);
      const accessToken: string | null = await getAccessToken();
      const keys = await generatePinataKey(accessToken);
      // Upload the selected file
      const uploadData = await uploadFile(selectedFile, keys.JWT);
      setCid(uploadData.IpfsHash);
      setLoading(false);
    } catch (error) {
      setLoading(false);
      console.log(error);
    }
  }
  return (
    <div className="flex flex-col gap-2 justify-center items-center w-full">
      <h1>Choose a file to upload</h1>
      <input type="file" onChange={fileHandler} />
      <button
        onClick={submitHandler}
        type="submit"
        className="p-2 rounded-md border-2 border-black"
      >
        {loading ? "Uploading..." : "Upload"}
      </button>
      {cid && (
        <a
          href={`/content/${cid}`}
          className="underline"
          target="_blank"
          rel="noreferrer"
        >
          {cid}
        </a>
      )}
    </div>
  );
}
In this component, we have a pretty simple set-up that lets a user pick a file and upload it securely using our signed JWT method. The only thing it’s missing is the signature with the connected wallet! We will be using the EIP-712 format for our signatures, so let’s make a new file in utils called 712.ts and paste in the following code.
export const domain = {
  name: "Sign Content",
  version: "1.0.0",
  chainId: 1,
} as const;

// The named list of all type definitions
export const types = {
  Sign: [
    { name: "address", type: "address" },
    { name: "cid", type: "string" },
    { name: "date", type: "string" },
  ],
  // Necessary to define salt param type
  EIP712Domain: [
    {
      name: "name",
      type: "string",
    },
    {
      name: "version",
      type: "string",
    },
    {
      name: "chainId",
      type: "uint256",
    },
  ],
};
This file simply exports the domain and types of our signature, particularly where we will pass in who signed the content (address), the cid of the content, and the date it was uploaded to Pinata. Back in our upload-form.tsx component, let’s update it to handle the signature.
"use client";

import { generatePinataKey, uploadFile } from "@/utils/upload";
import { getAccessToken, useWallets } from "@privy-io/react-auth";
import { useState } from "react";
import { domain, types } from "@/utils/712";

export function UploadForm() {
  const [selectedFile, setSelectedFile] = useState();
  const [loading, setLoading] = useState(false);
  const [cid, setCid] = useState("");
  const { ready, wallets } = useWallets();

  function fileHandler(event: any) {
    const file = event?.target?.files[0];
    setSelectedFile(file);
  }
  async function submitHandler() {
    try {
      setLoading(true);
      const accessToken: string | null = await getAccessToken();
      const keys = await generatePinataKey(accessToken);
      // Upload the selected file
      const uploadData = await uploadFile(selectedFile, keys.JWT);
      const wallet = wallets[0];
      // Prepare the message to be signed
      const message = {
        address: wallet.address,
        cid: uploadData?.IpfsHash,
        date: uploadData?.Timestamp,
      };
      // Prepare the sign data payload
      const typedData = {
        primaryType: "Sign",
        domain: domain,
        types: types,
        message: message,
      };
      // sign with user's connected wallet
      await wallet.switchChain(1);
      const provider = await wallet.getEthereumProvider();
      const signature = await provider.request({
        method: "eth_signTypedData_v4",
        params: [wallet.address, JSON.stringify(typedData)],
      });
      console.log(signature);

      // Make API call to register signature with CID with Pinata
      const sign = await fetch("/api/sign", {
        method: "POST",
        headers: {
          "Content-Type": "application/json",
          Authorization: `Bearer ${accessToken}`,
        },
        body: JSON.stringify({
          signature: signature,
          IpfsHash: uploadData?.IpfsHash,
        }),
      });
      if (sign.status === 401) {
        console.log("Content already signed");
        setLoading(false);
        return;
      }
      const signConfirm = await sign.json();
      console.log(signConfirm);
      setCid(uploadData.IpfsHash);
      setLoading(false);
    } catch (error) {
      setLoading(false);
      console.log(error);
    }
  }
  return (
    <div className="flex flex-col gap-2 justify-center items-center w-full">
      <h1>Choose a file to upload</h1>
      <input type="file" onChange={fileHandler} />
      <button
        onClick={submitHandler}
        type="submit"
        className="p-2 rounded-md border-2 border-black"
      >
        {loading ? "Uploading..." : "Upload"}
      </button>
      {cid && (
        <a
          href={`/content/${cid}`}
          className="underline"
          target="_blank"
          rel="noreferrer"
        >
          {cid}
        </a>
      )}
    </div>
  );
}
Lots of code here, so let’s break it down. First we updated our imports to include useWallets and our 712 variables. Inside the component, we use the wallets hook to get our wallets object. Then we use that in the submitHandler to perform the signature, where we form our message using the wallet address connected to our app, the CID and data from our upload, then prompt the user’s wallet to sign.
const wallet = wallets[0];
// Prepare the message to be signed
const message = {
  address: wallet.address,
  cid: uploadData?.IpfsHash,
  date: uploadData?.Timestamp,
};
// Prepare the sign data payload
const typedData = {
  primaryType: "Sign",
  domain: domain,
  types: types,
  message: message,
};
// sign with user's connected wallet
await wallet.switchChain(1);
const provider = await wallet.getEthereumProvider();
const signature = await provider.request({
  method: "eth_signTypedData_v4",
  params: [wallet.address, JSON.stringify(typedData)],
});
console.log(signature);
Now, while this gives us a signature, we need a way to add this to Pinata. To do that, we make an API call with all the information we had for the message.
// Make API call to register signature with CID with Pinata
const sign = await fetch("/api/sign", {
  method: "POST",
  headers: {
    "Content-Type": "application/json",
    Authorization: `Bearer ${accessToken}`,
  },
  body: JSON.stringify({
    signature: signature,
    IpfsHash: uploadData?.IpfsHash,
  }),
});
if (sign.status === 401) {
  console.log("Content already signed");
  setLoading(false);
  return;
}
const signConfirm = await sign.json();
console.log(signConfirm);
setCid(uploadData.IpfsHash);
setLoading(false);
We haven’t made that API route yet, so let’s do that now in app/api/sign/route.ts
import { type NextRequest, NextResponse } from "next/server";
import { verifySession } from "@/utils/session";

export const dynamic = "force-dynamic";

export async function POST(req: NextRequest, res: NextResponse) {
  const body = await req.json();
  const authToken = req?.headers?.get("authorization")?.replace("Bearer ", "") || "";

  const verified = await verifySession(authToken);
  if (!verified) {
    return new Response("Unauthorized", { status: 401 });
  }
  try {
    // API call to add signature to CID
    const postSignature = await fetch(
      `https://api.pinata.cloud/v3/ipfs/signature/${body.IpfsHash}`,
      {
        method: "POST",
        headers: {
          "Content-Type": "application/json",
          Authorization: `Bearer ${process.env.PINATA_JWT}`,
        },
        body: JSON.stringify({ signature: body.signature }),
      },
    );
    if (!postSignature.ok) {
      return NextResponse.json({ data: "Content already signed" }, { status: 401 });
    }
    const postSignatureRes = await postSignature.json();
    return NextResponse.json(postSignatureRes, { status: 200 });
  } catch (error) {
    console.log(error);
    return NextResponse.json({ text: "Error creating API Key:" }, { status: 500 });
  }
}
In this function, we verify the API call with Privy, just like we did earlier, and all we need to do is make an API call to api.pinata.cloud/v3/ipfs/signature/:cid where our cid is a path parameter and include the signature in the body of the request. The Pinata API will return a 401 if the content is already signed or wasn’t actually uploaded by the user doing the signing.
Back in our upload-form you can see that we set the CID as a state variable once the signature is posted to Pinata, and it points to a dynamic route of /content/${cid} that will act as the share method and verifying page.
Verifying
Now that we have a CID, and it’s signed, we could really use a way to verify it, and we’ll do that by creating a page that takes the CID as a path parameter. To do this we’ll make app/content/[cid]/page.tsx
import { CidView } from "@/components/cid-view";

// Fetch data about the file from pinList, things like the timestamp and name of the file
async function getData(cid: string) {
  try {
    const fileReq = await fetch(
      `https://api.pinata.cloud/data/pinList?cid=${cid}&status=pinned`,
      {
        method: "GET",
        headers: {
          "Content-Type": "application/json",
          Authorization: `Bearer ${process.env.PINATA_JWT}`,
        },
      },
    );
    const fileRes = await fileReq.json();
    return fileRes.rows;
  } catch (error) {
    return error;
  }
}

export default async function Page({ params }: { params: { cid: string } }) {
  // Dynamic path
  const cid = params.cid;
  // Getting data for CID
  const data = await getData(cid);

  return (
    <main className="flex min-h-screen flex-col items-center justify-start pt-24 gap-24">
      {/* Passing file into the CidView component */}
      <CidView cid={cid} data={data} />
    </main>
  );
}
In order to verify the file, we’re going to need the date it was pinned, which is something the Pinata API can provide us with pinList. We’ll leverage Next server side rendering by making an API call to Pinata with our cid as a query parameter, then pass that data into a CidView component, as well as the cid itself. Now let’s make that CidView in components/cid-view.tsx
"use client";

import { useState } from "react";
import { isAddress } from "viem";

export function CidView({ data, cid }: any) {
  const [verifyLoading, setVerifyLoading] = useState(false);
  const [complete, setComplete] = useState(false);
  const [verified, setVerified] = useState(false);
  const [address, setAddress] = useState("");

  function handleAddress(event: any) {
    setAddress(event.target.value);
  }

  async function verifyContent() {
    try {
      setVerifyLoading(true);
      // Check that the provided address is valid
      const validAddress = isAddress(address);
      if (!validAddress) {
        alert("invalid address");
        setVerifyLoading(false);
        return;
      }
      // API call to verify the content
      const verifyReq = await fetch("/api/verify", {
        method: "POST",
        headers: {
          "Content-Type": "application/json",
        },
        body: JSON.stringify({
          cid: cid,
          address: address,
          date: data[0].date_pinned,
        }),
      });
      if (!verifyReq.ok) {
        setVerified(false);
        setVerifyLoading(false);
        setComplete(true);
        return;
      }
      const verifyData = await verifyReq.json();
      console.log(verifyData);
      setVerified(verifyData);
      setVerifyLoading(false);
      setComplete(true);
    } catch (error) {
      console.log(error);
      setVerifyLoading(false);
    }
  }

  return (
    <div className="flex flex-col gap-4 justify-center items-center">
      <h1>Verify</h1>
      <h2>{cid}</h2>
      <input type="text" onChange={handleAddress} placeholder="address" />
      <button onClick={verifyContent} type="submit">
        Submit
      </button>
      {verified ? "OK" : "Not verified"}
    </div>
  );
}
In this component, we display the CID itself, provide a form to input an address, a button to verify it, as well as showing the results. The idea is that the user will provide the address of the author, and we’ll use the date and CID to complete the verification in verifyContent(). In that function, we send the cid, address, and date to an API route. Let’s make that now under app/api/verify/route.ts.
import { type NextRequest, NextResponse } from "next/server";
import { verifyTypedData, recoverTypedDataAddress, getAddress } from "viem";
import { domain, types } from "@/utils/712";

export const dynamic = "force-dynamic";

export async function POST(req: NextRequest, res: NextResponse) {
  const body = await req.json();
  try {
    // Get signature via the gateway
    const signatureReq = await fetch(
      `https://${process.env.NEXT_PUBLIC_GATEWAY_URL}/ipfs/${body.cid}`,
      {
        method: "HEAD",
      },
    );
    const signature = signatureReq.headers.get("pinata-signature");
    console.log("signature: ", signature);
    // All the other information provided by our component
    console.log("address: ", body.address);
    console.log("cid: ", body.cid);
    console.log("file date: ", body.date);

    // Recreate the message used in the signature
    const message = {
      address: body.address,
      cid: body.cid,
      date: body.date,
    };
    console.log(message);

    const address = await recoverTypedDataAddress({
      domain: domain as any,
      types: types,
      primaryType: "Sign",
      message,
      signature: signature as "0x",
    });

    console.log("Address: ", address);

    if (address !== getAddress(body.address)) {
      return NextResponse.json({ text: "Address does not match" }, { status: 401 });
    }

    // Verify the signature
    const verify = await verifyTypedData({
      address: body.address as "0x",
      domain: domain as any,
      types: types,
      primaryType: "Sign",
      message,
      signature: signature as "0x",
    });
    console.log(verify);

    // Returns true or false
    return NextResponse.json(verify, { status: 200 });
  } catch (error) {
    console.log(error);
    return NextResponse.json({ text: "Error verifying file" }, { status: 500 });
  }
}
In this API route, we perform the verification using several moving pieces. The first is our Pinata Gateway using the Content Attestation plugin. Now that we have a signed CID and the plugin enabled, when we make a request for that file we will get the pinata-signature as a header. Then we can use a combination of the address provided by the user, our cid, date, and signature to verify the content. We can also do a check of recoverTypedDataAddress to make sure that the address used in the message was actually the address that signed the content. That verification is returned as a boolean, which we can send back to the client! Here’s a peak of how the flow works in SIGNETS
If you’d like to see the finished repo of this tutorial, as well as the SIGNETs repo, you can view them with the links below:
Wrapping Up
At Pinata, we’re confident this is just the beginning how how content will be processed in the future, where everything we touch will be cryptographically signed and addressable with technology like IPFS. We can’t wait to see what developers build next!
Happy Pinning!